Simplified Plans By Ken Myers April 2018 All of the links are to v.1.0 plans. The current FT Simple Cub plans are v.1.1. The Flite Test (FT) Simple Cub Build Video and plans of this popular Dollar Tree Foam Board (DTFB) plane are found on the Flite Test Web site. Flite Test provides FREE plans for all of their designs. The plans are provided in Adobe Acrobat .pdf format. They are beautifully drawn by Dan Sponholz. The plans are formatted in four different ways;
There is an article on Flite Test, by Dan Sponholz (AKA SPONZ), on how to print these plans/templates. In the article he warns, "The biggest mistake people make when printing the tiled plans is to try printing them directly from a web browser (i.e. chrome, safari, explorer, etc.). For most PDF documents, printing from the web browser is perfectly acceptable. However, for printing technical drawings at a precise scale they simply do not give you enough control to achieve the desired results. NEVER print your plans from your web browser. ALWAYS download the files to your device and print them."
When the Flite Test plans for the Simple Cub are printed on 8-1/2" by 11" printer paper, they print to a lot of sheets of paper (60 for the Simple Cub) and require many, many cuts and taping together of the sheets of paper to become the useful plans that are used to create the individual parts. Some people cut the individual parts from the plans and affix them to poster board to make durable parts templates. Other folks just use the parts from the printed plan as templates and affix the paper directly to the foam board. I was not able to locate a suggested parts layout for the Simple Cub. I created a suggested parts layout guide using three sheets of DTFB.
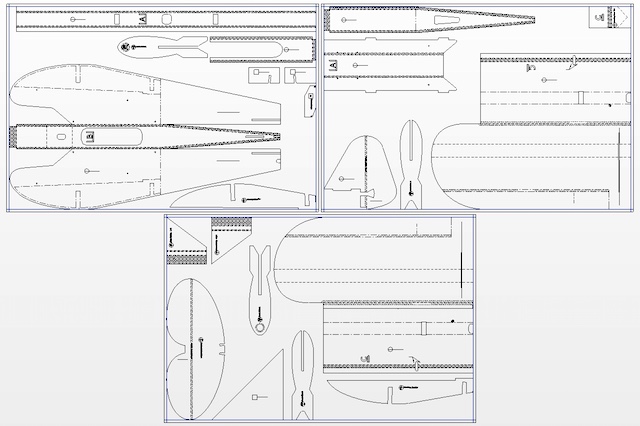
Suggested Parts Layout Guide When affixing the templates, poster board or paper, to the DTFB, remember that DTFB is not square and also not exactly 20" x 30". The parts are laid out to about 1/4" from the edges of the DTFB sheets. The exact locations are relative. Using the following method, the required number of sheets of paper and number of cuts and tapings are reduced dramatically. The pdf files found here are NOT tiled into poster format, therefore they CAN be printed on a Mac using the Preview program. Each sheet has its own cut marks as part of the drawing. Each grouping of pages is named for the major component found on the pages that make up the paper template pages, but there are many other templates along with the named major component. Before starting, create a folder on your computer, which could be named 'Simple Cub', to download the pdf files to. Do NOT download and use these plans, unless you want to build the Flite Test Simple Cub exactly as designed by Flite Test. They are here for example only to demonstrate how I set the plans/templates up for easier printing and assembly. The Fuselage Grouping There are 6 printed sheets that make up the templates for the Fuselage grouping. The Fuselage sheets contain the templates for the Fuselage, Landing Gear Tab, both Dihedral Gauges, the plywood firewall and the Throw Gauge. Link to the Fuselage pdf file.
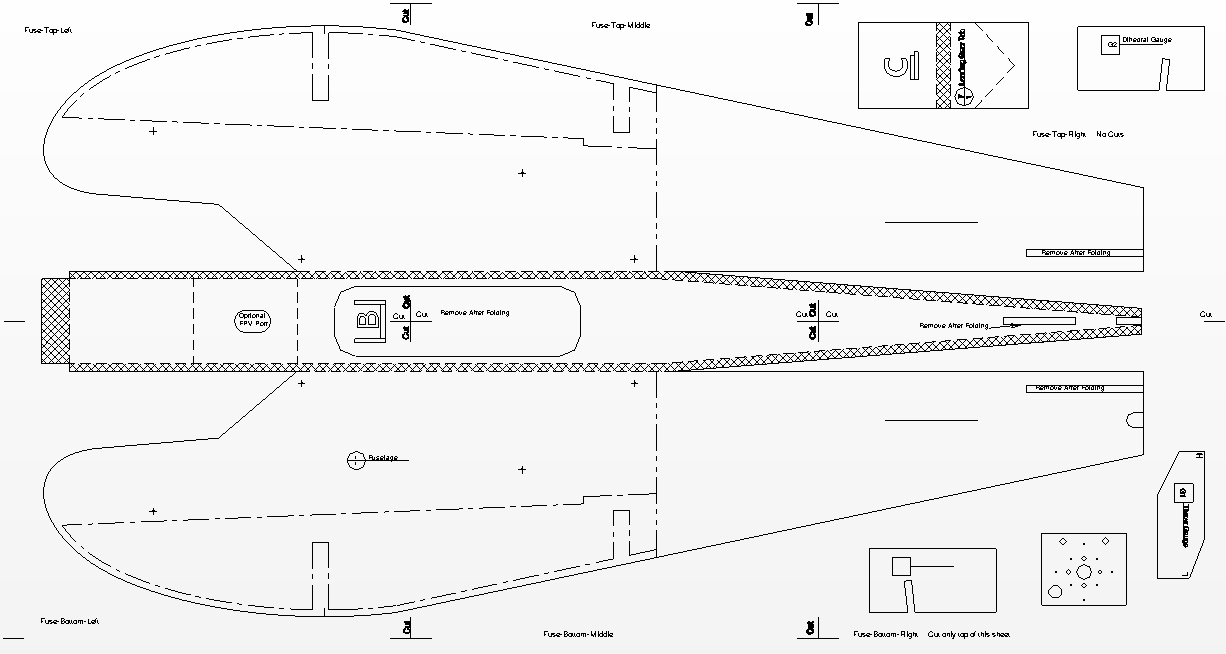
Fuselage Trimming Guide Open the Fuselage pdf file in Acrobat Reader or Preview on the Mac. Before printing, be sure that Actual size has been selected. Print the six pages. Assembling the pages Lay Fuse-Top-Right on the surface where the template sheets will be assembled. Sheet Fuse-Top-Right requires no trimming. On a cutting surface, like a large kitchen cutting board, trim only the right side of Fuse-Top-Middle using the trim/alignment marks on the right side. Align and tape in place, Fuse-Top-Middle over Fuse-Top-Right.
Trim only the right side of Fuse-Top-Left using the trim/alignment marks on the right side. Align and tape in place, Fuse-Top-Left over Fuse-Top-Middle. Trim only the top edge of Fuse-Bottom-Right. Align Fuse-Bottom-Right over the bottom of Fuse-Top-Right and tape in place. Trim the top and right side of Fuse-Bottom-Middle. Align Fuse-Bottom-Middle over Fuse-Bottom-Right and over Fuse-Top-Middle and tape in place. Trim the top and right side of Fuse-Bottom-Left. Align Fuse-Bottom-Left over Fuse-Bottom-Middle and over Fuse-Top-Left and tape in place. 6 sheets of paper have been joined using 7 cuts. Set the completed template sheet aside. The Horizontal Stabilizer (H-Stab) Grouping There are 6 printed sheets that make up the templates for the H-Stab grouping. The H-Stab sheets contain the templates for the Horizontal Stabilizer, Swappable Power Pod, both fuselage doublers, the Fuselage Bottom - Back, the Fuselage Bottom - Front and the Spar. 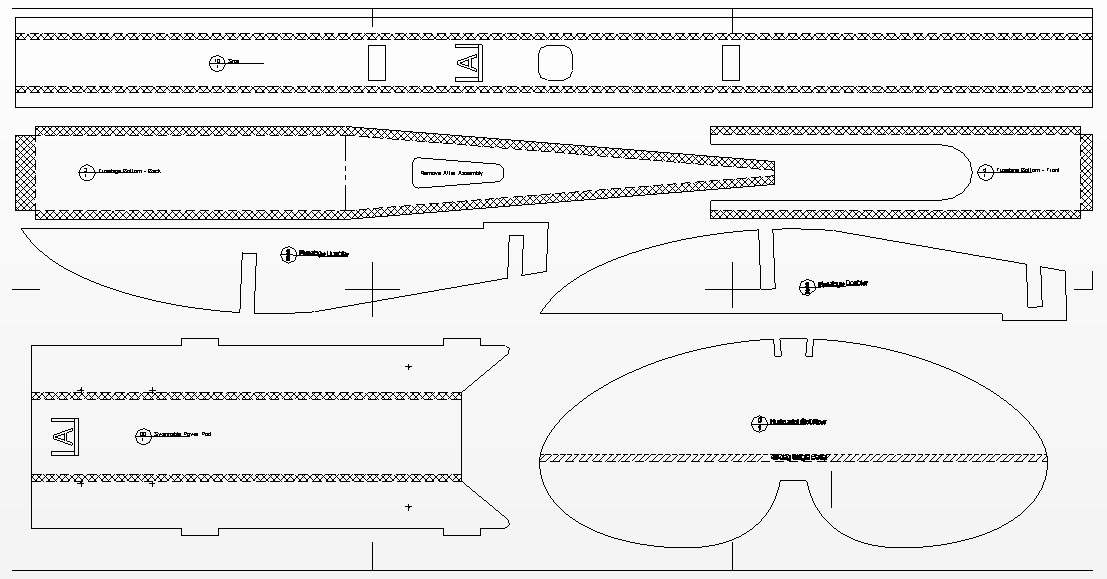
H-Stab Assembly Open the H-Stab pdf file in Acrobat Reader or Preview on the Mac. Before printing, be sure that Actual size has been selected. Print the six pages. The sheets are joined exactly the same way as the Fuselage Grouping, starting with H-Stab-Top-Right. 6 sheets of paper have been joined using 7 cuts. Set the completed template sheet aside. Left Wing Panel (LWP) Grouping There are 4 printed sheets that make up the templates for the LWP grouping. The LWP sheets contain the templates for the Left Wing Panel, Gear Fairing - Left, and control horns.
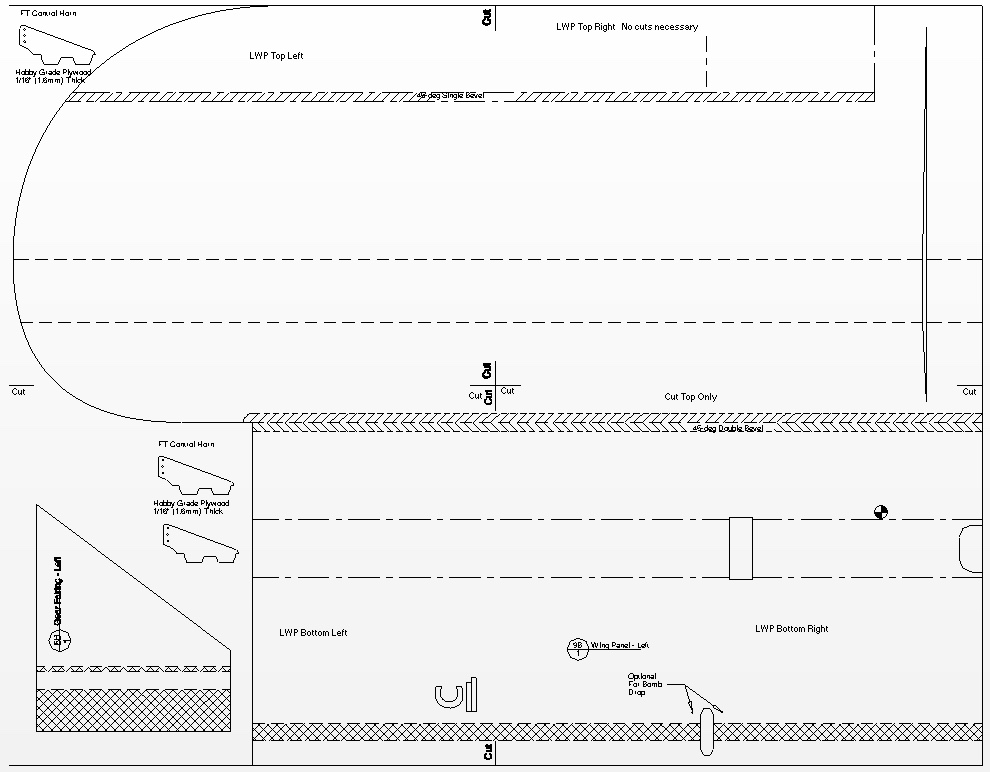
Left Wing Panel (LWP) Assembly Open all the 4 pages in Acrobat Reader or Preview on the Mac. Before printing, be sure that Actual size has been selected. The procedure is the same, except there are only 4 sheets to be joined. Start with LWP-Top-Right, which needs no trimming. Follow the same procedure as for the six sheets, but there are only 4 this time. 4 sheets of paper have been joined using 4 cuts. Set the completed template sheet aside. Right Wing Panel (RWP) Grouping There are 4 printed sheets that make up the templates for the RWP grouping. The RWP sheets contain the templates for the Right Wing Panel, Gear Fairing - Right, and more control horns.
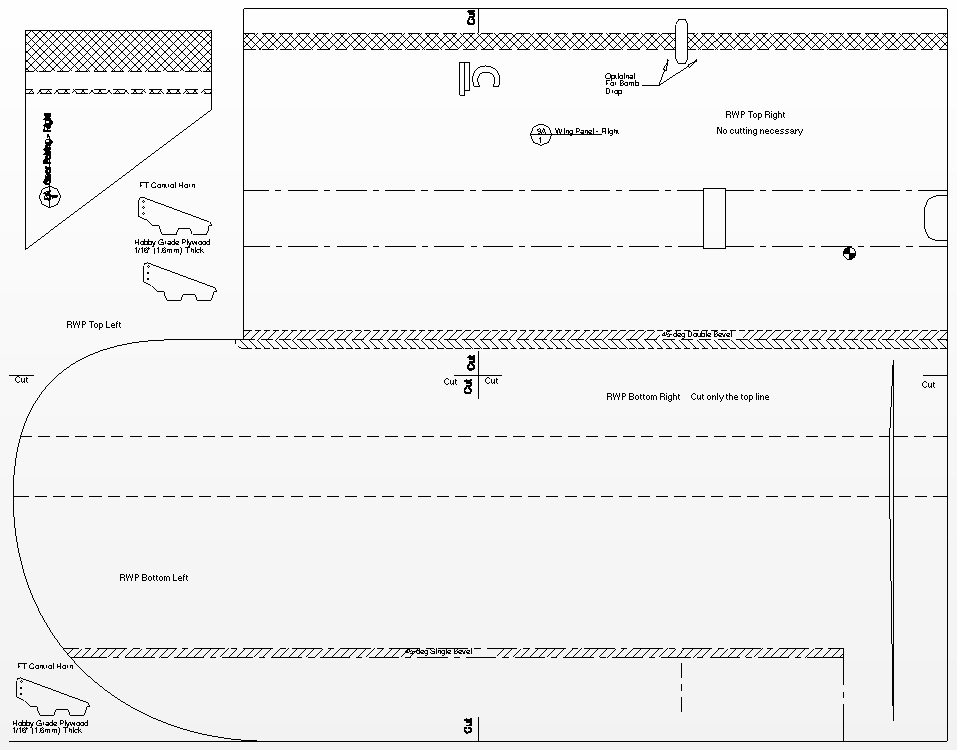
Right Wing Panel (RWP) Assembly Open all the 4 pages in Acrobat Reader or Preview on the Mac. Before printing, be sure that Actual size has been selected. The procedure is the same as the Left Wing Panel (LWP). RWP-Top Right needs no trimming. 4 sheets of paper have been joined using 4 cuts. Set the completed template sheet aside. Vertical Stabilizer (V-Stab) Grouping There are 2 printed sheets that make up the templates for the V-Stab grouping. The V-Stab sheets contain the templates for the Vertical Stabilizer (V-Stab), 90-deg (900) Triangle, and the Wire Bending Gauge for the landing gear.
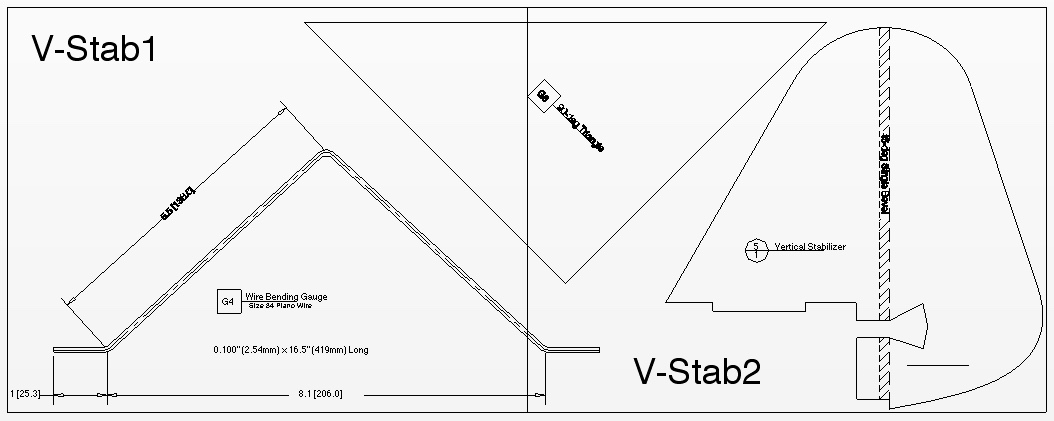
Vertical Stabilizer (V-Stab) Assembly Open both pages in Acrobat Reader or Preview on the Mac. Before printing, be sure that Actual size has been selected. The procedure is simple. Cut off the right side of V-Stab-Left using the cutting/alignment marks. Align V-Stab-Left over V-Stab-Right and tape. 2 sheets of paper have been joined using 1 cut. Set the completed template sheet aside. All of the templates have been created. If the optional bombs are desired, download and print 2 copies of "Bombs.pdf". I prefer to cut the parts out of the printed template sheets with about a 1/4" boarder around them and then use a glue stick and tape to affix them directly to the DTFB. Flite Test suggests transferring the paper templates to poster board. That's not a bad idea. How to do that is shown in the following video. Remember to cut out the parts "loosly" before gluing onto the poster board as suggested by Josh Bixler in the video. Since poster board has about the same dimensions as foam board, the same layout can be used on the poster board.
The Suggested Parts Layout Guide will work on the poster board too |