|
RC Flight Simulator for the Mac Standard Version 7.0.7 By Ipacs of Germany
By Ken Myers
Two column .pdf version suitable for printing. Preface With my left arm in a sling for at least six weeks, while recovering from rotator cuff surgery, I needed something to occupy my mind and time. I remembered seeing an ad for the new aerofly RC 7 RC Flight Simulator on page 119 of the April 2014 Model Aviation. The interesting thing, for me, was that there was a Mac version. I've owned, and used, four other RC flight simulators; the Dave Brown simulator for the Apple IIe/GS, MachineWorks NorthWest: CockpitMaster, Reflex XTR, and the free FMS flight simulator supplied with a Dynam USB 6-channel transmitter-type game controller purchased from NitroPlanes. The Dynam controller now comes with the ClearViewSE RC Flight Simulator. I'm not a huge fan of RC flight simulators for learning to fly RC planes. NONE of the previously mentioned simulators provided the field of vision found at the flying field. The perspective is not correct and the peripheral objects, to help the pilot stay aligned with the runway at the real field, are not available on the virtual display. After using the previously mentioned simulators, I believe that even the $20 NitroPlanes Windows based flight simulator, with the USB 6-channel transmitter-type game controller, is 'good enough' for RC flight training purposes. Since I only am interested in non-rotary aircraft, I concentrated on the functions and features for them. Most RC flight simulators are good for learning the basics of rotary flight. Typically, RC rotary flight does not require as large a field of vision as airplanes. A visit to the Web site listed in the ad, www.ikarus-usa.com, found all of the Mac versions listed as out of stock. A Google search lead to the Mac App Store where aerofly RC 7 is available as a download. The Standard version was listed for $44.99. With the MI sales tax added, it was $47.69. The Google search also lead me to the aerofly RC 7 Web site, www.aeroflyrc.com, where they noted that the Mac version is available in the Mac App store. There is a comparison chart on the aerofly Web site (www.aeroflyrc.com/compare.html) that compares the features of the Standard, Professional and Ultimate versions of the program. Using the aerofly compare page, it seemed that there was a difference in what was listed for the Standard Windows version and what I received as a download for the Mac. The comparison page on the Ikarus Web site shows that the comparison page on the aerofly site is incorrect. It is shown correctly on the Ikarus site. The search also lead to the download for the manual at dl1.aerofly.com/aerofly-rc-7-manual-english.pdf. After checking the system requirements, it was downloaded onto my 17-inch, 2011, MacBook Pro. The manual also indicated that the Mac versions were available at the Mac App Store. It was a good thing I downloaded the manual. There was no manual delivered in the HUGE download. Version 7.0.7 was downloaded from the Mac App store on March 31, 2014. It is a HUGE application and took many, many hours to download using my very slow DSL connection. A through reading of the manual was completed while running the program to learn each feature. The manual, covering all three versions, documents the Windows versions with no mention of Mac alternate keys. For Example - from the manual
There are no Page Up/Down keys on my MacBook Pro. One way that Page Up on the Mac is accomplished by pressing and holding the fn key and tapping the up arrow key. Page Down is accomplished by pressing and holding the fn key and tapping the down arrow key. The Page Up/Down keys are used to change to different flying areas in a multi-panorama scenery, which is a venue with more than one flying site, like the AMA site in Muncie, IN. I also found several undocumented features.
Press the spacebar at any time to return to the original take off position. Use the scroll wheel on the mouse to increase or decrease the field of vision. For a hand launch, place the cursor over the aircraft until the cursor changes to an up arrow over a down arrow. Click and hold the left mouse button and move the aircraft off of the ground. Throttle up. Let go of the mouse button. Grab the transmitter stick and start flying. That is very much like hand launching by yourself. Also an aircraft can be hand launched from a 2 meter height by pressing the J key or 50 meters by pressing the H key.
To use the glider tow feature requires a second controller to be set up and the two player splitscreen view to be used. The tow plane is not automatically programmed into the simulation and must be flown. US units (Simulation, Simulation setting, language) don't appear to be activated in the Standard version. The aircraft descriptions remain in metric units and do not change when US units are chosen. Setting Up the Program and Controller
Since a Dynam USB 6-channel transmitter-like controller was on-hand, it was attached to the laptop and the program started. The manual noted, "If you connect an USB controller to your computer at the program start, which has not yet been calibrated in the aerofly-flight simulator, you will first be asked whether it is a transmitter, joystick or a gamepad." That did not happen. I had to choose PPM from the Controller drop-down menu before the input device setup and calibration would start. Sometimes I also had to choose PPM from the Controller drop-down menu after the computer had been shut off over night before it recognized the transmitter-like USB controller again. The controller calibration was easily completed following the on-screen prompts. I did have to return to a previous screen and recalibrate the elevator maximum throw. The program did NOT have to be activated as noted in the manual. My guess is that activation is taken care of by downloading from the Mac App Store. Once the transmitter was calibrated, a glow high-wing trainer, a Great Planes PT-40, was presented automatically and positioned on the default runway, Bennet Flying Field in Nevada, USA, with its engine running. I could not resist taking the plane up for a short hop or two. I thought, "Wow! This is set to the best field of vision/view I'd ever seen." Landings from both directions were very realistic! After using the simulator for several days, I thought that I was not satisfied with the location of the center of gravity (CG) and the preset throws on some of the airplanes' control surfaces. Using dual rates tamed down some of the control surfaces for my type of flying. Selecting Aircraft Aircraft are selected from the main menu Aircraft, Load Aircraft or the Quick Launch menu. There are several folders displayed in the Select aircraft window. The Folders
Other options on the Select aircraft screen
Sort by - sorts the aircraft by; Name, Type, Span, Mass, Scale or Time. The right pain of the window shows the model selected and information about it. Other options that may be available in the right window pain, depending on the aircraft and program version Paint scheme - allows the paint scheme to be changed if an alternate scheme exists Available configurations - allows a change to the aircraft's attributes if an alternate configuration exists A Scaling feature appears in the right pain of the Professional and Ultimate versions that allows the user to change the scale of all models in a range between 50% and 200% of their original size. It is NOT activated in the Standard version. Scenery, besides providing a place to fly, is the key that unlocks the special features of the program. There are six different venues included in the Standard version. The differences between the three types of scenery are NOT described in the manual. I have provided the information on the types of scenery. 4D Sceneries - 1 included. 4D adds time of day to the three dimensions, length, width and height. The terrain, objects, and lighting are rendered 'on the fly' by the program. Only 4D allows for different points of view or camera placement.
There are also folders for Favorites and Recently visited and preview folders for the scenery found in the Pro and Ultimate versions. Four of the six fields provided with the Standard version have what the manual notes as 'contests'. I call them tasks or skill building experiences. They include; Balloon popping, Limbo flying, Pylon race, Air race, Landing contest, Autorotation landing. Only Balloon popping, Limbo flying, and Landing contest are available in some sceneries in the Standard version. There are also indicators as to whether a winch or helper is available to launch a sailplane. If a sailplane winch or helper is not available at a particular venue, the keys J and H can be used to launch a sailplane from two different heights or the mouse can be used to raise the aircraft to hand launch height. Right clicking on any part of the active scenery brings up a Quick launch menu of the most frequently used functions available at that venue. Instruments and Information Window This feature presents in-flight instruments and information in the form of small, relocatable, transparent windows on the main screen. Sometimes their default placement makes them difficult to see. In-flight Information:
Instruments:
Point of View (POV) or Various Camera Modes There are very good technical reasons for what the user sees on screen being called camera positions, but I find it easier to understand calling it the viewer's POV. Your field of vision is what you see when you are looking at something. Your focus is best in the center of the field of vision and the diminishes on objects towards the periphery. All of the following are found in the View menu or one of its sub-menus. The field of vision, how large the area is that the user is focusing on, can be set in the sub-menu Camera Settings or by using specified keys to increase or decrease the field of vision. The scroll roller on a mouse can also be used to change the field of vision. This is NOT documented in the manual. The V and B keys may be used to select alternate aircraft starting positions at a given venue. Fixed view mode is the typical RC flying view. Follow mode, Pivot mode, and Cockpit mode are available with 4D scenery for just 'playing around'. For the model planes in the Standard version, Follow and Cockpit view were the same. Cockpit view may only apply when a full-scale plane is selected. There were no full-scale planes in the Mac Standard version. Camera Settings found as a sub-menu of View
Moving the POV and the Model The POV can be changed by holding down the left mouse button and moving the mouse. The aircraft's position can be changed by placing the cursor over the aircraft, notating the cursor change and then dragging the mouse. This is very handy for hand launching. The Controller Menu The Controller Menu sets up and calibrates the controller. The advanced options allow and assign functions to specific switches, buttons and sliders on the transmitter or keyboard. Dual rates and expo can also be set up or the ones from a real transmitter used. Up to four different transmitter configurations can be saved. There are special notes for using the throttle channel with helicopters and gliders. For fun, a second controller can be attached for a second player. When a second plane is added, the default is to split the screen vertically. That can be changed to splitting the screen horizontally or having no split screen by selecting Menu View, Splitscreen, None. Contests and Flight Training Modes
The symbols on the scenery thumbnail denote what Extras are available at a given venue. The Winch launch or helper and Dynamic Soaring are available in the Standard version. I found it easiest to get to the Setup screens using the Quick Launch method of right clicking on the scenery and choosing settings. Simulation setup
Conditions
Wind
Graphics Control
The Graphics Settings Window
Other Graphics Settings
Extras Menu
There are two inflight positioning indicators available, Position and Flightpath, that provide a means of locating the plane. Only Flightpath is available in the Standard version. The scenery screen's Extras menu is where the available contests are selected as well as Glider Tow. Help Menu The help menu contains a listing of the Keyboard Shortcuts and Tips. There are links to the aerofly site and information about aerofly. Recording and Playback of Flights is not available in the Standard version. Multiplayer mode is available in the Standard version but was not tried. The Model Editor is not available in the Standard version. This was a HUGE disappointment! I really wanted to change the CG and the control surface throws on the powered airplanes as the preprogrammed ones needed tweaking to suit my preferences. Conclusions and Recommendations I have been a RC airplane pilot, model builder and designer for over 50 years. I have been a qualified RC airplane flight instructor and precision RC aerobatics pilot for over 40 years. The graphics, flight physics and wind physics in this simulator are good and pretty much emulate the 'feel' of flying an RC airplane. This simulator still falls short in the area of field of vision compared to what is viewed, or viewable, at an actual flying site. For me, the field of vision that best approximated the real field vision was when 'Keep ground in view' was selected from the View menu or by the Shift+G key combination. I did not find the Landing Assist useful. Landing practice could have been better implemented by setting up the limbo pole at the threshold of the centerline of the runway. Also, if the balloons, used in the balloon bust, were tethered to the center of the runway, they could have acted as a landing training guide. A transmitter, with a USB-Interface-adapter or transmitter-like USB controller, is a must for learning to fly RC. This simulator is as good at preparing someone to learn to fly RC airplanes as any of the Windows RC flight simulators I've owned, used or seen. The absolute HUGE plus is that it runs well on my older (2011) MacBook Pro. A minor glitch is that it occasionally 'hangs up' on exit and 'freezes'. I like to run the simulator in Full Screen mode. To make it easier to close if it 'freezes', I leave a folder open on my desktop. That allows me to do a command+tab key combination to return to the desktop where a Force Quit... can be accomplished. The Standard version for the Mac is a good learning aid and good value. Overall I give it a 4-Star out of 5-Star Rating. It is better than some of the Windows RC flight simulators and as good as most. It runs on a Mac. What could be better than that? |
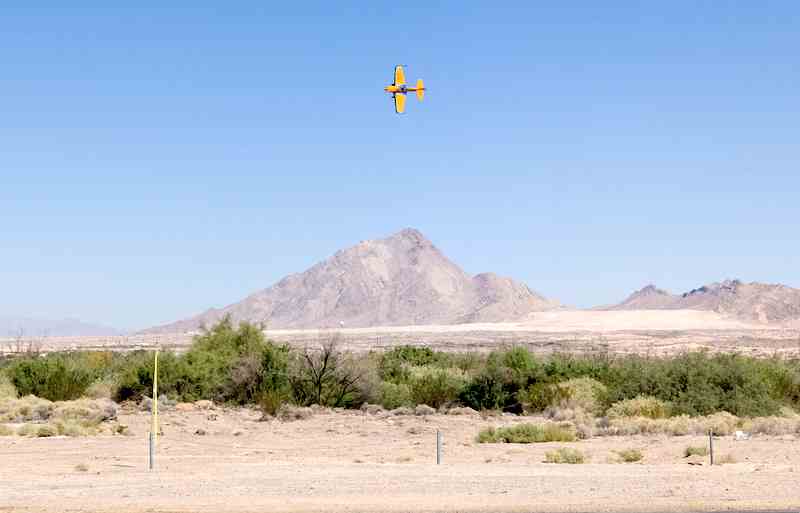
Above is a screen capture of a point roll in aerofly RC7 Standard.
|
Afterward
I have had only two 'program lockups' upon exiting many, many times for the past three weeks. I am using this RC flight simulator as a training aid, not a computer game. I have been working on perfecting my 4-point roll, slow roll and rolling circle. I have also been flying one plane as a two-channel, throttle and rudder, to prepare me for flying my new two-channel Minnie Mambo. I adjusted the Adrenaline 120 and the Sbach to fly like my electric sport planes using the dual rate function for lower throttle, less aileron, elevator and rudder deflection. I could not change the engine sound to that of an electric power system, but that was irrelevant as it doesn't change the flight characteristics. I used the little J-3 Cub for two-channel training by selecting keyboard for the elevator assignment and not assigning any keys in the assign channels (Advanced) menu. It was already set up with elevator and rudder on the right stick, so it was easy to do. For me, there are enough plane choices in the Standard version to have planes similar to the types of planes that I fly. There are also several good choices for a beginners. In the 'New AeroflyRC7' thread on RC Groups, there has been criticism of the lack of different types of aircraft in all of the versions. Member: acesimmer
Both posters complain about the lack of variety in aircraft choices. acesimmer notes that he uses the simulator to, "... practice my scale jet and prop routines for air show displays." This indicates that he may be a seasoned pilot if he is flying turbine powered jets. He also noted that, "Unfortunately the majority of models are to similar to keep much interest in the Sim." bobbysbrother said that he is a 'noob' and, "... the choice of models is totally inadequate." He complained that, "... there is very few electrics, hardly any foamies, and nothing from the mainstream of the hobby (in the USA) as far as I can tell." I don't disagree that the plane selection, especially in the Standard version, could be better, but it is certainly adequate if the simulator is to be used as a learning and practice tool. Their comments lead me to classify the powered airplanes and see exactly what 'types' are in the Standard version. I used a spreadsheet to create tables of the powered airplanes. I sorted the virtual models by their Wing Cube Loading factors from easiest to fly to hardest to fly. It worked as well on the virtual models as it does for the real world models. I suggest setting up the high rates with 100% for the throttle, ailerons, elevator and rudder and 75% for the throttle, ailerons, elevator and rudder for low rate. BK MSS Freedom Glider WCL factor 3.54 - typical for powered gliders and backyard flyers. It is easy to fly but requires a lot of up trim, even with the motor on. It is quite similar to flying a Bixler. The motor needs to be changed in the Glider section of the controller menu to Z axis to use the throttle. It would be nice to have a typical RET (rudder-elevator-throttle) thermal powered sailplane available as they are great trainers. BORMATIC Cam-Flyer Q WCL factor 3.69 - typical for lower powered, lightly loaded flying wings and backyard flyers. When using low rates, it is a gentle flying wing. With high rates, it is still quite easy to fly. Ikarus SloFun WCL factor 4.60 - typical for backyard flyers. The Standard version, with with low rates is easy to fly. With high rates on it can be 'thrown around the sky' very smartly. The no aileron version is not a good choice because it really does fly like a 3-channel plane using RET and having no dihedral. Yuck. Sbach 342 1/2-scale WCL factor 5.40 - typical for 3D foamies and other backyard flyers. Yes, you read that correctly. With the standard configuration selected and using low rates it is an easy flying backyard flyer. Go to full rates and it flies like a small, foamie 3D plane. Select the the competition configuration and it can be flown as a giant-scale 3D performer. J-3 Cub 1/23-scale WCL factor 6.22 - typical for park flyers. It is an easy flying RET plane when flown with low rates. PZL-104 Wilga 1/4-scale WCL factor 6.83 - typical for park flyers and lightly loaded sport planes. On low rates it makes for a good 4-channel, high-wing, trainer. With high rates it is a good flying sport plane. Pitts S-2B 1/4 scale WCL factor 6.95 - typical for sport planes and sport scale planes. Flying on low rates provides for a good biplane trainer. It is 'short coupled' and on high rates can really move across the sky and do anything the full-scale can do. Kyosho Clamato EP 1400 WCL factor 7.28 - typical for sport planes and sport scale planes. Very much like the E-flite Apprentice and Flyzone Sensei. Low rates are a good place to start to get the feel. High rates provide quite spirited performance. Good 4-channel, high-wing trainer. Great Planes PT-40 WCL factor 7.34 - typical for sport planes and sport scale planes. As expected by the similar WCL factor, it provides about the same flight experience as the Clamato in the Standard configuration. It is a bit more 'spirited' in the Advanced configuration. F4U Corsair WCL factor 8.06 - typical for sport planes and sport scale planes. This one flies like a low-wing trainer. Unfortunately, the weight is too light for a 'real' 1/4.5-scale Corsair. The CARF Models version, with the same wingspan, weighs 21kg yielding a WCL factor of a more realistic 11.84. Using dual rates on this virtual one isn't necessary. P-40E WCL factor 10.21 - typical for advanced sport planes and advanced sport scale planes. This one flies like an advanced low-wing trainer. Unfortunately, the weight is too light for a 'real' 1/4.8-scale P-40E. The Nick Ziroli 1/4.8 P-40 Warhawk version, with the same wingspan, weighs 15.42kg yielding a more realistic WCL factor of 16.40. That WCL factor indicates that the Ziroli P-40E would be in the Expert Sport and Expert Sport Scale range.
Multiplex Funjet WCL factor 10.85 - typical for advanced sport planes and advanced sport scale planes. Low rates help to get the feel for this quick, little one. Adrenaline 120 WCL factor 11.18 - typical for advanced sport planes and advanced sport scale planes. This most resembles the type of low-wing sport planes that I fly. 04/28/2014 I wanted to order the USB-Interface for aeroflyRC7 ($39.90) and Single Line Converter ($47.60) to use my Tactic TTX650 transmitter with the program. Ikarus-USA wanted $15 to ship both items. I ordered only the USB-Interface for aeroflyRC7 and the shipping was an outrageous $9.95. I ordered the Single Line Converter from Heads Up Hobby and shipping was $2. I wish Heads Up Hobby had the USB-Interface! Ikarus-USA charges too much for shipping!!! No real person answers the phone at Ikarus-USA. YUCK! 05/03/2014 The USB-Interface for aeroflyRC7 arrived on April 30. Heads Up Hobby shipped the Single Line Converter on 04/28 but the postal service didn't get it here until 05/03. The pre-linked receiver was attached to the Single Line Converter and then the USB-Interface for aeroflyRC7. The previously programmed transmitter was turned on and then the USB-Interface was plugged into the computer. The program was started. It immediately recognize the new controller. The controller was set up and calibrated. The Adrenalin 120 and SBach were assigned their own model memories and the throws adjusted, using the transmitter's rate function, to the way I prefer to fly them. It feels really great 'flying' the planes with my own transmitter. 05/22/2014 Reviews are opinions, and some of the reviews on the Mac Store App page for this program have been quite harsh. On May 22, WWW.HELP wrote a 1-star review in all capital letters. "I BOUGHT THE EASY CONTROLLER AND IT LASTED A WEEK." and "BY THE WAY THIS IS THE ONLY USB CONTROLLER YOU CAN USE." I am not sure what the Easy Controller is, but it is NOT the only controller that you can use. As I noted, I used the Dynam 6-channel to start with. All of the supported controllers are listed at http://www.aeroflyrc.com/input-devices.html. The one that Ikarus markets is called the Universal USB GameCommander. On May 21, Pretzelcuatl gave it a 2-star rating. The review noted, "When it works it is great..." I've had no program issues for the better part of a month now and that is with almost daily usage. The review also noted, "...there is nothing in the program or the manual to talk you through anything." The manual covers how to set up the controller and the program automatically does the set up when the controller is recognized. That's easy enough. What else do you need? On May 15, bostonchai called the program "junk" and gave it a 1-star rating. The review notes, "others on the market are waaaaaaayyy better!!!!!" That could be true, but for me, the Standard version of this program is good for practicing the maneuvers I need to work on. I believe it to be good enough to do some initial airplane training on for my student pilots. I'm not really having any of the issues noted in the poor reviews. I could just be lucky, or my opinion and experience differs from theirs. Addendum 12/09/2013 The there is an interesting discussion on RC Groups about the planes in this simulator not stalling. It starts at post #3. Getting planes into a spin is also difficult to do as the planes don't 'break' well when slowed and full elevator applied. I was thinking that moving the CG and adding weight might make the stalls more realistic. Unfortunately, the Standard version does not allow for this. I sill find it very useful for practicing horizontal maneuvers. |