| |
The February Meeting
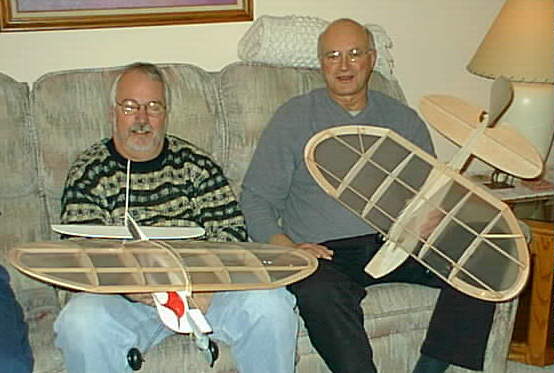
 The February meeting was held at Ken’s house. There were many planes in
various stages of construction. Larry Rice and Ken Welch each had Clancy Yard Bee’s. Larry Rice had a really neat looking
decoration scheme on it. They are both to be powered by Speed 400s. The February meeting was held at Ken’s house. There were many planes in
various stages of construction. Larry Rice and Ken Welch each had Clancy Yard Bee’s. Larry Rice had a really neat looking
decoration scheme on it. They are both to be powered by Speed 400s.
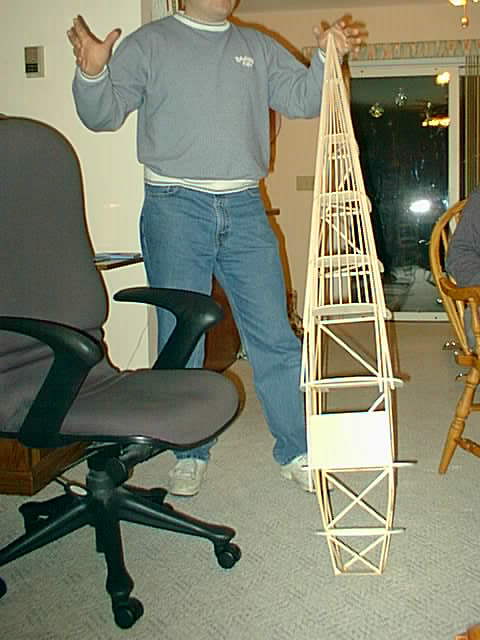
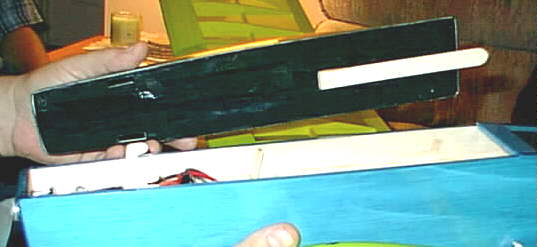
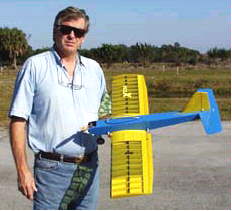
Jim Young is building a big, Weddel Williams. Shown
is the bottom half of the fuselage. Yes, that’s Jim’s headless body.
There was a lot of talk about where we will be flying this year, since the Midwest
R/C Society did not pick up their option on the Rushton Road field. We have to decided to fly when and where we can. April,
May, July and August have already been scheduled with more "meeting" dates in the works. Anyone who receives
this newsletter and has an AMA or MAAC membership is welcome to fly at the EFO meetings though out the summer.
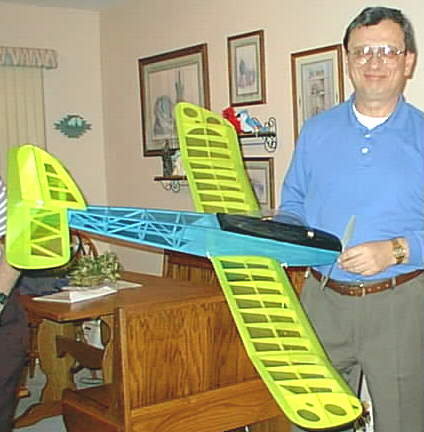
Gus Nuerenberg showed off a neat, little Mini-Amptique that he is scratch
building. It features a fiberglass fuselage, that he made himself. Hopefully, we’ll see the finished model soon.
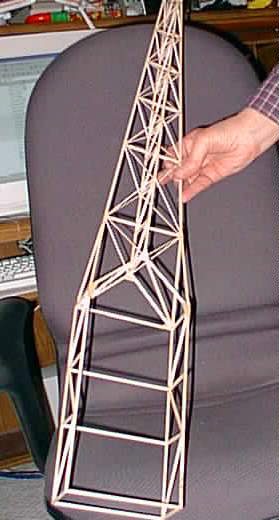
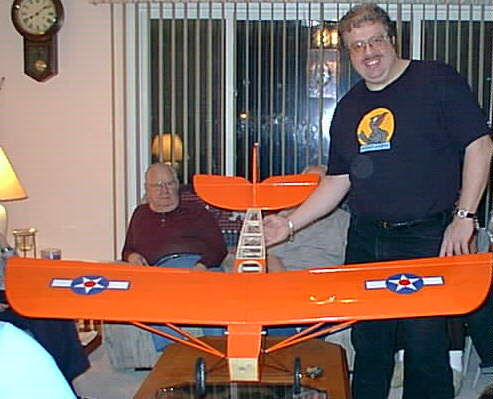
Don Skiff showed off a very unique structure for the scale
Monospar that
he is building. It is extremely strong and light. We were all very impressed with it. Don’s lower half of
the fuselage shown here.
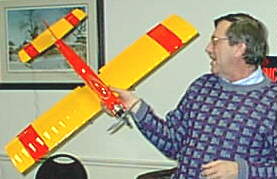
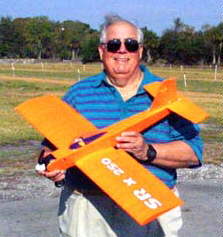
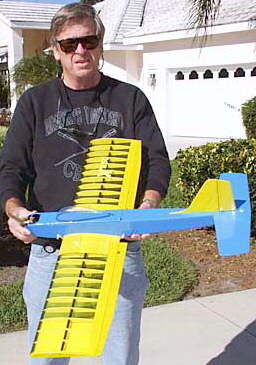
Ken Myers showed off his completed X250 from SR Batteries.
His full building report was in the last Ampeer. The photo here is not from Ken’s house, but when he did a show and tell at the
Midwest R/C Society.
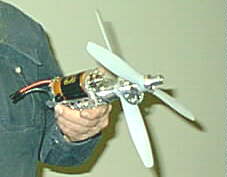
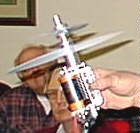
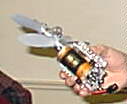
Keith Shaw was NOT at the February EFO meeting, but Ken wanted to
share these photos of Keith’s latest project. It is a gear-drive for an Astro Flight 40. It swings two counter-rotating props and
will be used in his upcoming Bugatti Racer. Don’t look for this plane soon though. Unfortunately, Keith will not be able to start
construction on the airframe for quite a while yet. When it’s done, it will certainly be a beauty!
Photo 1 Photo 2 Photo 3
Return to "What's In This Issue?"
Jet Enthusiasts
From Ivan Munninghoff
email: jetsrus@pcisys.net
For those of you who have not yet heard, we've started a new jet organization called the U.S. R/C Jet Command (USRCJC).
This solicitation is going to all the jet guys in my address book who are not yet members of USRCJC. We jet guys (ICDF, EDF, Turbine, ALL jets) have spent years complaining about the status quo, and it's time we did something about it. The USRCJC has been under consideration for more than a year, and its principles and concepts have been discussed with a significant number of jet folks all over the country. The outcome of those talks has been so positive that the organization has been put in place.
There have already been three issues of the newsletter (the AFTERBURNER) sent to the 64 current members. A brand new "list" is on line, available
to members for exchanging information and ideas. We're about to get our own web page. We're making good progress toward becoming a Special Interest Group (SIG) to the AMA. We've got some exciting progress to
report regarding getting homebuilt turbines and kit-built turbines approved by the AMA. We're addressing jet insurance issues. I've made some brochures and decals to hand out. We even have actual volunteers heading
up some committees! And we've done all this without internal strife.
The intent of the new organization is to have more fun (that's why we fly jets, isn't it?) with our hobby, while we actually address the issues affecting us. The new organization will be participatory; that is, we
anticipate that each member will contribute-articles for the newsletter or participating in committee actions, for example.
To join this group, all you have to do is send an email to the address at the top of the article, and I'll get you the three back issues of the AFTERBURNER (fairly big files, lots of color and photographs-we're doing soft-copy newsletters ONLY), and get you subscribed to the USRCJC list.
At least at this point, there are no dues-the only
requirement for membership is an enthusiasm for jets and a willingness to participate.
There are literally dozens of issues a jet organization needs to address, and we ought to actually do something about them, rather than sit back, complain, and take pot-shots at each other. We need to address safety,
before it's addressed for us without our participation. We need to talk about insurance. We need to be sure that the USRCJC gives something to every member so there's a reason to join. There are other points, and many of them are described in the AFTERBURNER issue #1, waiting for volunteers to head up the committees.
The USRCJC needs YOU! We not only need and value your input and your help, but we need your numbers. The AMA pays more attention to groups who
are not only well-organized but are well-populated. Please, if you value your hobby and have a minute to spare to help assure its growth and security, take a moment to sign up. It's a very small investment! Thank
you very much. Ivan
A Bit More on Ivan from Ken Myers
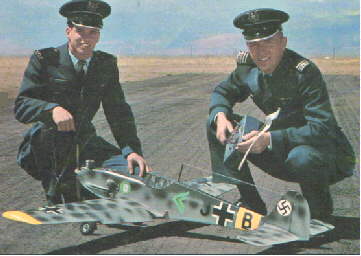
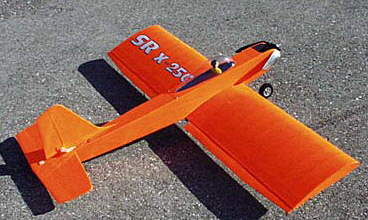
While I was putting the March issue together, I needed an ad for the Skylark. I
found the ad I needed in the May 1969 American Aircraft Modeler. I had saved the issue because it had a neat pattern airplane
disguised as a Bf-109. The designer was, tah dah, Ivan Munninghoff. In the photo, Cadet Ron Schrenck is on the left and Cadet
Ivan Munninghoff on the right. This was the cover photo and taken at the Pikes Peak R/C Club.
A Couple of Comments to Ken from Ivan
From: Ivan Munninghoff email: jetsrus@pcisys.net
Jeez, you DO have old magazines! That was one of my first published designs. It was actually a locally designed pattern/sport airplane of the day, dressed up to look like a 109. Flew it in pattern and scale. Did fairly
well with it!
No problem with using the letter in your Ampeer. Cool, as a matter of fact. As of this moment, we have 186 members!!
(I mentioned what I was flying in 1969 - a Midwest Neuport with Citizenship
Tx and Rx and Rand GG) Galloping Ghost?!? I was right, you ARE old!!! Oops, I flew that, too.
Oh, well. I'm the Kid holding the transmitter, a six-channel 6 meter F&M, my first digital system. Airborne weight with four servos was 32 ounces! Great Scott!!
Return to "What's In This Issue?"
March Meeting
Rich Sawicki showed a Moravia ARF from
Markys Hobbies. It is powered by a Dymond 480 2.5:1 new electric APC 9x6 on 8 cells. Rich plans to try and fly it inside the
Oakland Yard dome, the first part of April. The cool hatch system on the Moravia.
Richard Utkan showed his Chubby Lady with a stock motor 280. It
weighs only 13 ounces but does seem to have a problem with the landing gear being "mushy."
Mike Holroyde purchased a BlueMax from Hobby Lobby for $189. It
is an ARF and all you have to do is glue on the tail install the R/C and power system and go fly. Empty weight is about three
pounds.
Ken Myers also hauled up his E250 and X250 and there were several
questions about them. Wally Brandel brought the fuselage to his Revolt! He was trying to install a Hobbico gyro and
was having a problem. We’re not sure we solved the problem, but lots of heads were scratched over it. This plane flies very
nicely.
The EFO also gained two new members, Bob Fowler and John Trim.
Welcome aboard gentlemen.
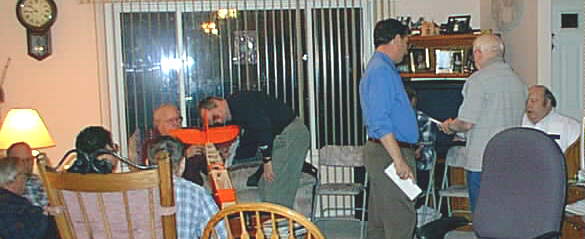
After the "official" meeting was over, several
members
discuss electric flight and check over Mike’s plane, while others are in the dining room and kitchen trying to set Wally’s gyro and enjoy
some refreshments.
There will be an April meeting at Ken’s house on Thursday, April 6 at 7:30. There
will also be April Flying "meetings."
Doug Kursinsky brought along the R/C Report survey forms for the
club members to fill out. Thanks Doug. Very handy!
Mike had a question about why his Jomar SM-4 was not getting full throttle with
his Futaba Skysport Tx while it was with others. Ken shared the article in the March 2000 R/C Report where Pete Waters
shared a modification to Futaba transmitter to remove the physical stops that Futaba puts on their throttle sticks.
We’d talked about flying dates in April, but we’ll start flying with a vengeance in May. The May meeting will be at the Romeo field and we’ll also fly with MISS.
Return to "What's In This Issue?"
Ken’s SR Batteries X250 Takes Wing!
This morning, March 4, I took my SR Batteries X250 for its maiden flight to the
Midwest R/C Society Field on 5 Mile Rd. in Northville Township, Michigan, USA.
First I flew my Lightening E250 to get back into the groove, since I'd not flown any
during the winter. I'd modified my E250 with a shaft saver and new hatch hold-down arrangement during the layover. Everything
went as usual. Flies great!
By the time I got to the SR Batteries X250, at 9:15 EST USA, the winds had risen
well above 10 mph, probably closer to 15 mph, as all of the flags in the area were standing straight out and whipping quite hard.
My wife and I did a range check this morning at home, so I got the pin and did one last check, even though I'd checked it a lot!
Luckily, I found my rudder servo was reversed! Yikes! Fixed no problem. I put the battery in place to achieve the CG shown on
the plans. Next I walked to the center of the frozen field. The grass was short and packed down. The X250 lifted off easily and
ground steering was easy with the rudder on the short takeoff roll. It started to climb like a rocket. Jamming the down trim all the
way forward brought it under control. I flew around for a couple of minutes and decided to land and move the battery pack
further forward. On the initial landing, the nose never dropped with the power chopped, but it was rock solid on final all the way
in. I just flew it in "flat" as it lost altitude but did not change attitude. After moving the battery forward and without
recharging, I took off again easily from the frozen grass. I still had the down trim in it, which was good, since it flew well. I
looped, rolled and felt out the plane in different flight attitudes. No matter what upright attitude I put it in, it wanted to stay in the
air. No inverted flight on this flight. The plane flew almost as well throttled back as it did full power. I kited it around a bit, with
just enough power to keep it in the air. It was not hard to hold heading, and when it would start to fall off a little to one side, in its
very nose up attitude, a little aileron brought it back to "kite" position. My throws feel just right, and I have no idea what they are.
I believe I've probably measured control throws a dozen times, maybe in 40+ years of flying R/C. If it's not "enough",
land and change it. If it is too much, just don't "push" the sticks as far, land and change it.
The Multiplex 450 Turbo, with a standard 7x5 APC prop, worked well on the 7
VERY OLD Sanyo 900SCR cells. Time to order some 1250SCRs! Weight at takeoff was 29.5 ounces.
The second landing was much better, with the nose dropping as it came in on final.
A little too much flair a little too high with the moderate wind and it started a climb with power off. Not to worry. I put the nose
down and came if for a semi-nice one. (Semi-nice means: not a 10 the way landings were judged in the old AMA pattern, but
most judges would have given it an 8 or 8.5.)
With the wind up enough to not be fun to fly, I came home a happy camper with 2
planes in the same shape they were when I left and having gotten in my two first flights of the season.
I know I'm going to like the little X250. I would recommend moving the balance
point forward 1/4" to 3/8" from what is shown on the plans. I believe the balance point on the plans is optimum for
flight duration and aerobatics, but I think most folks will feel more comfortable with this new plane if it is just a "tad"
nose heavy to start with. As they become more comfortable, they'll probably want to move the CG aft to that shown on the plans
and get the perfect combination of aerobatics and flight time.
Return to "What's In This Issue?"
Gordy Cells
From: Gordy Stahl GordySoar@aol.com |
| I have plenty of Gordy Cells right now, just for your information :-) |
Gordy Stahl
9303 LeBeau Ct
Louisville Ky 40299
502-491- 5001 |
Return to "What's In This Issue?"
More X250s
The Tale of John’s Plane
From: John A. Williams email: qyetfli@home.com
Feb. 5: I'm now covering mine. I’m going to use the SR recommended power. I might be able to get a photo of
the nose wheel steering I did or the wing bolt hold down. I'll try. I sent a picture of Luther Burriss's with a Astro 020 Brushless
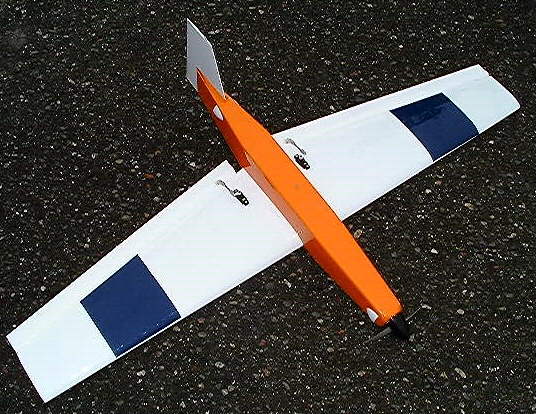
X-250. This color scheme needs redoing. It is too fast and small to see and orientation is poor.
I'm going for visibility with mine. Corsair Blue on the bottom and bright safety orange on top with white AMA #s. He has better eyes than I have.
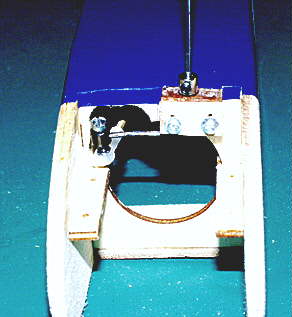
Luther Burriss designed this steering system. I used a different hook up than his
because I wanted it to be adjustable. This shot is the firewall inverted. I used the same diameter wire
as the kit, and made this new nose gear. I used a Dubro aileron ball link to give it adjustment. I had to open the firewall to give the
link clearance. There is 3/32 left in the lower right hand corner of three layers of light ply soaked in CA. I debated raising the
motor with 1/8 light ply
shims on the engine mount to create the vertical clearance. Because Larry and Steve did so much research on this plane, I
decided not to change the thrust line.
The block holding the gear wire is pine, end and side coated with CA, fronted by
1/32 ply to prevent splitting, epoxied on. There is an AL tube between the wire and wood. Of course there is the collar to take the
load.
I should explain, I don't believe this is needed for take off. (It’s not. KM)
They say it is off in ten feet or so. I did it to be able to taxi back on our Macadam runway. Because I have knee problems, other
fliers are constantly popping up to retrieve my planes. If I get it back, they won't have to do that.
[On takeoff from Larry Sribnick to John…
Hi John...
It looks like a nice system. When I fly off of black top, our runway is about 25' to 30' wide. If I hold full up elevator and full right rudder, I can almost make a 180 on the runway. That's why I haven't bothered with a steerable nose wheel. However, I understand why you want more control, and your system should give it to you. As I told you on the phone, our next design will be fully steerable, but then it's a very different ship from the X250. It's still looking like May for the new design.
Thanks for keeping me in the loop. I really appreciate it. If I can help in any way, just let me know.
Thanks,
Larry]
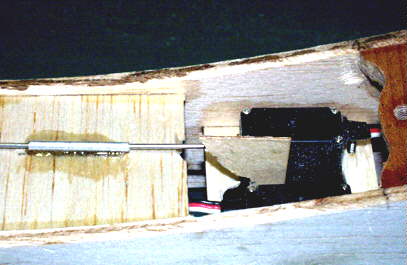
I used the same materials as SR. The brass connector is soldered on to the end.
Two short pieces of tubing are slipped on and a right angle bend is made where it will come up through the bottom area to the
rudder servo arm. The push rod runs between the wing and the bottom of the battery tray, and the little AL tubes are epoxies to
the bottom of the battery tray to keep the tracking straight. When I tested the steering, I found to much flex in the right angle
bend of that really small
diameter wire. Rather than go to a larger size, which Luther Burris must have used, (his worked perfectly), I epoxied a 1/32
piece of ply across the right angle as a stiffener. That did it. It probably could have been
engineered more easily through the battery compartment, but I always keep this uncluttered in case I want to mess with different
power options.
On the very right edge of the picture you can see the bolt hole for the 10-32 wing hold down.
This is pine. I can't stand to look at rubber bands, or put up with resultant trim changes.
Mine will definitely fly next weekend. Then we can compare with Luther's Astro
020 brushless.
I also asked Larry to enter my order for his next, non glider kit, whatever it is. He
said he might lose it and to order at announcement time. I've been building these things since 1954, and I have never seen a finer
engineered and designed kit. I personally would prefer to pay the higher price and get this kind of kit. They surely deserve the
kudos. I'm going to do a complete write up in a week or so on our site of the two X-250s.
Feb. 19 Here is a picture of the first one in our club belonging to Luther Burris. He
flew it 5 days after the package arrived. His weighs 24 ounces, spans 36 inches, uses an 020 Astro brushless with 9-6 prop. He
hits the throttle, stays on the ground 20 feet pulls up and it does a 90 degree turn strait up to about 100 feet. I'm not sure how
many cells, but I'll find out. It is what Astro suggests. I bought that motor when Larry Sribnick said two years ago this plane
would be designed for it. Luther flies better than I do, so I stayed with Steve's advice and bought the SR power package. It will
fly longer and be less knee knocking which suits me fine. Luther's plane
is fast, small and hard to see. I spent the extra weight to make sure I could see it. Mine is 26 ounces. It had an abbreviated test
hop by Luther, who was lucky to get it down as it was slightly tail heavy. It flew with the wrong prop, as a part was missing for
this power package. Steve is sending it, and I'm going to wait to give it a full chance.
For those of you who haven't seen this kit, you are in for a treat. I've been building
these things since 1954, and I have never, that is never, seen such fine quality, engineering, and parts fit in all my life. I tried to
order Larry's next non glider kit sight unseen, but he said to order when it emerges. The thing is totally jig built. You would have to
work at it to get it wrong. My 250 has 8 500s in an SR pack.. I just bought a spare. I had intended to "roll" my own.
Larry welds and there is exactly enough vertical room to house his battery with the
two layers of Velcro. I'm afraid even solder braid might be too thick. Besides, he deserves the business for producing such a fine
kit. I'll let you know how mine flies when I get the missing parts.
Greg Judy of Vinyl Graphics did the outlined SR wing graphic as close as we could
get. I think it looks good.
I found an Aeronaut 9-5 folder in my pile of goodies. Luther Burriss, who is now
an experienced X-250 flyer, took it for a short hop.
With the steering, which works great, bolt hold down and high visibility Ultracote it
weighs 26 ounces.
March 3: My X-250 flies great with the stock 400. You won't need the heavier gear. If you pounce it in, better
the wire gives a little rather than the structure. It will bend right back. What Larry says about off in 15 feet works. I use the
steering to get it back. Luther's 24 oz X-250 only had 8 500s, so mine isn't so bad at 26 oz. His does sizzling aerobatics, but I
really don't think that is what this little plane was designed for. Mine loops fine from level fight. I'm going to increase aileron
throw for snappier rolls, and desensitize around center stick.
You are going to love this plane Ken. I can't wait till Larry gets the next one going.
Jeff Dessert’s X250
From: Jeff Dessert email: jeffdessert@hotmail.com
I had it out last weekend for a test flight. Found the elevator sensitive and the
ailerons not sensitive enough. I've increased the aileron throws and added some exponential to the elevator but won't get a
chance to test the new settings until next weekend at MWE2000. If the ailerons are still not sensitive enough, I'll be replacing
them with a new set probably 1/4 to 3/8 inch wider. (I didn’t find this a problem on mine. KM) The CG on plans seems
to be wrong. If using 10 cell pack of
500ARs, the first set of cells need to be just in front of leading edge.
It's not a fast airplane but loops very easily from level flight. I may look at trying
one of the new APC electric props, probably a 8x6 instead of the 9x5 folder to get a bit more speed. I built my X-250 box stock
except for using 5/64" wire for landing gear and installing aileron servo on top of wing. It looks really weird having a servo
hanging out in the slipstream in my opinion.
A Few More Thoughts From Larry Sribnick:
Father of the X250
I took a look at some of the comments about the X250 on R/C Online and the
E-Zone yesterday. All of them were favorable, but some of the guys have missed the intended purpose of the X250. I
guess as a designer, I'm going to have to develop a thick skin. I keep wanting to run out into the street yelling, "No, don't do
that! I didn't intend it to be used that way!!!"
Everyone seems to want to shoe horn a bigger motor and battery pack into the
X250. My intention was a 25 to 35 MPH docile airplane that would do consecutive loops until you got tired of doing
them and one that would leap into the air in about 2' of ground roll from a hard surface. I also wanted 10+ minute flight times
because the usual criticism of electric flight by the gas guys is the limited flight times they think electric flight gives
you. Well, the X250 does everything I intended it to, so I'm happy.
My concern it that by increasing the weight with bigger motors and heavier battery
packs, they'll get faster flights (50 mph), but will end up with a squirrelly airplane that only gives them 4 to 5 minutes of flying time. I guess I hope people don't miss how nice the stock X250 is because they read
about the highly modified ones.
Don't get me wrong. Your modifications make sense. I specifically sized the
fuselage so you could use the battery packs you're using and I had tests
with the Speed 480 in mind for later this Spring.
I'm finding it's like being a parent. I've done my best and now I'll have to pat the
X250 on it's behind and send it out into the world on it's own. I hope people will be gentle with it.
On the Missing Washers
I forgot to comment on something you had in your review. If you re read the
instruction manual, you'll see that it says "wheel retaining washers," not "steel retaining washers."
The small brass washers you found were the ones you were supposed to use and are the ones shown in the photograph. I've been
trying to find ones that are larger in outside diameter while still being 1/16" ID, but I haven't had any luck yet. The brass
washers are small but they do the job.
On Balance
I've never found it necessary to balance a low wing aircraft upside down. (I
mentioned to Larry, that I balance a low wing upside down. KM) I always do it from the tips. I think some of the new
fliers would be confused by balancing upside down because it would make it more difficult to judge what it the "proper"
angle for the aircraft. It's probably a matter of personal preference.
I've seen some of the references to the X250 being unstable, (Definitely NOT
unstable. I put it into some intentional "bad" attitudes during the first flight. This plane is very stable and
has no bad habits. KM) but I KNOW that it's perfect if you just put the CG where indicated. In fact, it's not at all critical,
and I've played with it all over the place without the ship ever getting unstable. I've wondered if it's a radio problem that they think
is CG. I had one guy who complained about the ship being underpowered and unable to do even a single loop from straight and
level flight. After several Email messages he finally admitted that he was using a 6V Speed 400 direct drive with a 6x3 prop on 6
cells!!! In the meantime he's telling people the X250 won't perform. With the specified system you can do consecutive loops for 7
minutes. That's why it's so important to get
information out, so if people do have a problem they look for the cause rather than blame the aircraft.
Ken’s Comments
As you can see from the comments from John, myself and others, Larry is really in
the loop. Got a problem or question, just contact him via phone or email. He is very responsive and definitely one of the good
guys.
I very much want you to keep in mind what Larry said last month and this about his
plane. He met his design criteria perfectly. Stock, the plane makes a nice, long flying, slow aerobatic plane. Useful both outside
and in a large dome, as at the Oakland Yard here in the Pontiac, MI area.
While I really like the way I’ve made mine fly, that was my intention. I
wanted to try a power system with a bit more umph, and my system with Larry’s great engineering has made another very viable
package. When I get my 1250SCRs, aerobatic flight times will exceed 8 minutes. It’s a fun plane, and we all thank you Mr.
S - Can’t wait for the next one!
Return to "What's In This Issue?"
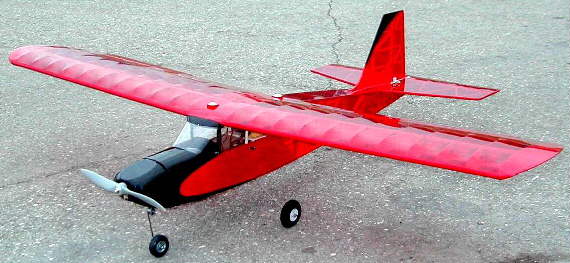
Electric Conversion of the Popular SIG Kadet Seniorita
By Grant Calkins
Channel Islands Condors
Muroc Model Masters, Edwards AFB, California
Email: CasinoOp@thegrid.net
The Seniorita, a kit from SIG manufacturing, has long been a popular trainer-like
R/C plane. It's known as an especially stable flyer, and is made largely in the good old stick-built fashion with lots of truss-like
structure showing through the covering. Normally the kit calls for a .15 to .35 glow engine, but I of course wanted it to be
electric. Another change I made was to add ailerons, which I made from blue foam and positioned near the wing tips. They each
measure 13" x 3". The final deviation I made from the stock Seniorita was to craft a wing bolt-down system in place
of the rubber band/dowel method. I covered the entire plane with transparent red FlightKote, and added modest amounts of black
trim.
I chose a Cermark 05 Cobalt 6v motor with AstroFlight 2.4:1 gearbox turning an
11-8 prop. However, the firewall location was too far forward to properly position this power train. So I mounted the motor
"in" the firewall to achieve the correct propeller placement. Note that, due to the single stage gear reduction of this
gearbox, the motor has to be wired backwards so that the prop will turn the right direction. When doing this you should probably
retime the motor for reverse rotation (I didn't - actually I forgot - but the motor seems to run fine anyway). I used a 7x2000 mAh
motor battery pack, and a separate 270 mAh Rx battery pack. ESC was an Astro Flight 217D. Radio Rx is JR, as are the
elevator and rudder servos. Aileron servo is a single Hitec HS-80 mounted on the bottom underside of the wing near the root with
actuator "snakes" curving outwards and rearwards to the ailerons. I used the supplied steerable nose wheel assembly,
driving the steering with a second small "snake" ganged to the rudder servo. This works very well and is extremely
light weight. All-up weight was 63.5 oz, only 1.5 oz more than "stock".
The first flight on Feb 9 was as perfect as an already-trimmed plane. Roll was
straight requiring just modest nose wheel inputs, liftoff was quick and level, and this plane (with it's new ailerons) was the most
stable I've ever witnessed. You set a roll, neutralize the sticks, and the plane maintains that roll orientation until you manually
change it. Power was more than adequate, and flights of 7 to 10 minutes are now routine. The motor draws just 24 A at full load
(voltage 8.3 v) which is almost exactly 200 watts. One reason the Seniorita flies so well is it's very low wing loading, just 12
oz/sq ft!
Try building an electric SIG Seniorita - I think you'll love it.
Return to "What's In This Issue?"
Conversion of Evans .09 Slow Motion
From: Brian Sawyer email: brians@econco.com
I read the "Electric Wonder Flys" article in the Sept. 99' issue of
Ampeer. That little airplane has interested me since I first saw it. The article stirred my thinking process. I've been
wanting to try an electric airplane. The wing loading of an electric conversion "Wonder" looked a little marginal. I
wanted a little more chance of success on my first electric try. Then I remembered a Bill Evans article on the .09 slow motion in
the August 1997 Model Aviation. A co-worker said that the Scimitar series flew well. The article said it was a "go were
you point it, no bad habits airplane". Hmm. Wing area of the Slow Motion is 379-sq. in. vs. 320-sq. in. for the Wonder.
That was good. I love to plans build. That did it, I was going to build one.
Modifications
To keep the weight down I made the following changes:
Fuselage sides change from 1/8" to 3/32" Balsa
Delete landing gear
Delete nose gear steering servo
Change wing sheeting from 1/16" balsa to 70 lb. Kraft paper/epoxy
Change firewall ply from 1/4" to 3/32"
Other changes
Mount servos in top of wing.
Move firewall forward to front of fuselage.
Taper nose to a reduced firewall, 1 3/4" x 1 3/4" to better fit motor
Change square stock in fuse corners to triangle stock
Add plastic spoon cooling scoops.
Delete F2 & substitute balsa 1/8"x 1/2" strip & 1/8" x 3/4" ply for wing dowel holder.
Power System
Motor: Magnetic Mayhem, direct drive
Battery: 1500mA 7 cell car pack
Speed Control: Stephen Vorkoetter design, home built
Prop: APC 7-4
Flying weight: 45 oz.
Hitec535 Receiver
Hitec HS80 Servos (2)
270 ma Receiver pack
Building was easy, the fuselage is a simple box. I made the wing harder than it
should have been. I tried to cut the foam wing cores single handed, not a good idea. I spent 2 evenings filling and sanding the
cores. I skinned the wings per an article in RCM several years ago on covering wings using 70 lb. Brown Kraft paper &
Epoxy. Remember to cut the airfoil template oversize as the paper skin is much thinner than 1/16" balsa.
Flying
The first attempt was not good. The throw was too soft. It flopped in the grass
about 40 ft away, ripping out the wing mounting blocks. After repairs, the next attempt a week later was much better. My helper
gave it a firm toss into the wind and away it went. Solid climb right away. Change to low rates on both elevators and ailerons.
Wow! Look at it groove! Power is adequate. (Note: I'm used to flying a .60 powered Sportster) If you pull the nose up and add
power it climbs well, but slows down. Big graceful loops need a little dive. Rolls are axial. Slow flight is very steady. Landing
speed is surprisingly slow. Hold it just over the grass and keep feeding in up elevator until it gently drops in. Alex who helped me
remarked that it was nice to pickup your plane after flying and not get oily. For a first try at electric flight, I'm happy.
Return to "What's In This Issue?"
The X250 from SR Batteries
by Ken Myers
The Specifics
| Wing Span: | 36.1875 in. -- 919.2mm |
| Wing Chord: | 7 in. + ailerons -- 177.8mm |
| Wing Area less ailerons: | 253 sq.in. - 16.34dm2 |
| Aileron Area: | 29 sq.in. -- 1.87dm2 |
| Wing Area: | 282 sq.in. -- 18.21dm2 |
| Wing Area minus area covered by fuselage: | 267 sq.in. -- 17.24dm2 |
| Wing weight before covering: | 3.8 oz. -- 107.7g |
| Wing weight after covering: | 4.8 oz. -- 136g |
| Fuselage weight before covering: | 1.6 oz. -- 45.4g |
| Fuselage weight after covering: | 1.8 oz. -- 51g |
| Finished wing weight w/landing gear: | 5.6 oz. - 158.8g |
| Finished fuselage weight w/landing gear: | 2.2 oz. -- 62.4g |
| Finished horizontal stab and elevator weight: | 0.6 oz. -- 17g |
| Finished vertical stab and rudder weight: | 0.2 oz. -- 5.7g |
| Total finished airframe weight: | 9.4 oz. -- 266.5g |
| Total finished plane weight with 7x900SCRs and 450 Turbo motor: | 29.5 oz. -- 836g |
| Wing loading: | 15.9 oz./sq.ft -- 48.5g/dm2 |
| Approx. power loading using APC 7x4 @ 19 amps: |
72 watts input per lb. -- 159 watts input per Kg |
| Estimated approx. airspeed: | 50 mph -- 80KPH |
| Approx. stall speed: | 15 mph -- 24KPH |
| Approx. flight time with Sanyo 900SRCs: | 6 minutes |
| Approx. flight time with Sanyo 1250SCRs: | 8 minutes |
| Motor: | Multiplex 450 Turbo - 4.8 oz. -- 135g |
| Astro Flight prop adapter & 7x4 APC: | 0.6 oz. - 15g |
| Battery (7-cell 900SCR): | 10.4 oz. -- 295g |
| Onboard R/C components: | 3.15 oz. - 89g |
| Hitec 555 Rx: | 0.75 oz. --21.3g |
| 3 Hitec HS-81 servos: | 1.8 oz. - 51g |
| Astro Flight 215D ESC: | 0.6 oz. - 15g |
| Adhesives: | Jet, Super Jet & RC-56 |
| Covering: | EconoKote/TowerKote |
| Note: | The HUGE majority of the hardware used is right in the kit! |
| Weights as Percents of Total Weight (29.5 oz.) |
| Finished Airframe Weight: | 31.9% |
| R/C Components: | 10.7% |
| Battery (7-cell 900SCR): | 35.3% |
| Motor w/prop: | 18.3% |
| Battery & Motor: | 53.6% |
| Unaccounted for weight: | 3.8% |
| Unaccounted for weight is about 1 ounce and would include
rounding errors, pushrods and inaccurately measured components. |
* * * * *
After viewing this attractive little bird at Toledo, I decided that I just had to have
one. After a long phone discussion with Larry about the kit, the order was placed and arrived in short order.
When I inspected the aileron version of this kit, I found all of the components
neatly packaged. There is a great 51 page photo enhanced instruction manual, a four page parts layout sheet, a sheet on using
the gapless hinges provided and very nice plans, plus very complete hardware including the lite wheels.
I gave the manual a good once over and started the actual building on Saturday,
January 15.
Before I get into some more detailed notes, I must tell you that I had shown the
laser cut kit at the January EFO meeting. The members had many favorable comments. It certainly is a very good kit, and Larry
really did his homework on this one. Built stock and with Larry's list of power system and R/C components, it is a very good
plane and extremely easy to build.
Unfortunately, I just can't seem to build a plane stock. (I’ll pay for this later, while
Larry gloats!) I'll note the changes that I made. There was nothing, nothing wrong with what Larry has
done, but I've got a problem and just can't seem to build a stock kit. That is one reason I've never submitted a review to any
national or international magazine. I just have to stick my fingers into and change it.
General Notes:
The wing went together easily. The jig works easily. The laser cut parts were easily
removed from the excellent balsa. I could not have hand-picked better balsa myself.
The only part that was a bit tricky was adding the landing gear blocks.
My first modification was that I don't use hinges. The photo clearly shows the
technique that I've used for years on large and small glow and electric planes. It is a bit time consuming, but very easy to do. It
works, and I like it. Larry’s gapless hinges will work just fine and be a lot less work.
The second modification can also be seen in the photo. I moved the aileron linkage
so that it will be inside the fuselage. This also required modification to the fuselage.
One of the very few problems cropped up when I tried to solder the washers on
the landing gear. I couldn't find them, so I had to substitute with some that I had. The only washers that I could find in the kit
appeared to be brass and too small. The manual calls for steel. I guess I could have misplaced them.
The fuselage went together easily, along with the vertical and rudder. Everything
went smoothly. Unfortunately, the battery pack I'm using, didn’t fit quite as nicely as it did on the plan, but that is not the kit's
fault. It's mine. I didn't measure closely enough. I redid the pack, and now it is a nice fit.
I chose to glue on the wing. That’s not a transportation problem for me with this
size plane.
To mount the Permax 450 Turbo, I put 100 grit sandpaper on the Maxx S400 motor
mounts using a spray adhesive called Stix-It. I added another 1/8" to the height of the beam mounts and mounted the motor
using the Maxx S400 mount. I modified the hatch holddown to allow easier access to the battery. The swing latch can be seen
behind the canopy in the finished photo.
I had originally planned to use the Hitec HS-60's that were recommended, but they
had not arrived by the time I needed them. I went to Joe‘s Hobbies and picked up some HS-81‘s instead. This required
modifying the original mounting for the elevator and rudder servos to use the HS-81's. As I mounted the rudder and elevator
servos, the receiver found itself a home by falling into it. (See photo)
The plane was finished on the eighth day. That was the day I installed all of the
radio components and pushrods. This turned out to be a much longer process than anticipated, as fitting the aileron servo turned
out to be much more difficult than I had anticipated. (My own fault!) It took several tries, and a couple of sets of pushrods, but it
is working great now. Rudder and elevator servos and pushrods were easy. Placement of the receiver was an accident. It fell
into the top area when I was working, and since it wanted to go there on its own, I let it stay there with some Velcro holding it in
place.
It will be at least a month and a half before I give it a try. I'm NOT a winter flier,
but I can be patient. I have plenty of other projects for this winter, but it was nice to know that I had a plane completely finished
before the February Midwest and EFO meetings. Usually I finish them the weekend AFTER the meetings!
Not being satisfied with the landing gear, I purchased some 5/64" piano wire
to use. The 5/64" gear added about 0.2 oz. to the total weight of the plane. Larry has assured me that the 1/16" gear
is just fine. (See his comments later.)
I can’t wait to fly this little gem. It is available from:
SR Batteries, Inc.
Box 287
Bellport, NY 11713
Phone: 631.286.0079 Fax: 631.286.0901
Email: info@srbatteries.com
Website: www.srbatteries.com
Aileron version: $79.95 Rudder/Elevator version: $69.95
Comments from Larry Sribnick:
Larry had asked me to do it stock and told me why. When he found that I
was indeed modifying it, he wanted to tell me, and you, why he’d chosen to do many of the things the way he did. Here
are Larry’s comments. Any of my comments within his will be in italics.
I thought you might be interested in some of the "whys" behind the
design details in the X250.
Like you, I started off with 3/32" wire for the landing gear. (I was
thinking of it, but didn’t use them. Km) When done, the landing gear looked like it was made out of 1/4" steel rod!
Overkill doesn't begin to describe my reactions. My concern was that I wanted to keep the structure light and with the 3/32"
gear, all of the shock loads would be taken by the airframe rather than the landing gear. So, I redid the gear with 1/16" wire.
Although it's very flexible, it doesn't transmit anything to the airframe. The gear takes all the knocks. We've never deformed the
main gear legs but the nose gear leg does tend to be bent back if you fly off of rough surfaces as I do. However, it only takes a
moment to rebend the nose gear back to where it belongs, and I'd much rather rebend or replace landing gear legs than have the
airframe break. That's why I give full size drawings of the landing gear legs on the plans. I figure it will be easy for the builder to
make new gear legs if he has to. The key point is that I'd rather rebend gear than rebuild the airplane.
That leads to why the aileron servo comes out the bottom of the wing. I've seen so
many aircraft with upright aileron servos that in a crash, when the wing shifts on the fuselage, the aileron servo tries to come
through the side of the fuselage. By mounting the aileron servo through the bottom of the wing, the wing can shift all it wants and
again, there won't be any damage to the fuselage or wing.
Monokote type hinges have always been my favorites as they are with you.
However, the tape hinge material we developed with 3M is really great. It's all a matter of personal preference.
I'm sorry your aileron control rod hookups took so long. If you had followed my
design it would have taken minutes instead of hours (he, he, he!). (Okay, gloat. I deserve it! Km) You really should
give my aluminum/steel wire pushrods a try because they really work well and are very light. (I did use them on the elevator
and rudder, and they are very cool and light! Km)
I agree that the X250 really lends itself to being a one piece aircraft. I just had the
minimizing of crash damage in mind, and that's why I did it the way I did. The other reason for being a two piece design is that
we'll be bringing out a float kit for the X250 this summer and with it will be a second rudder/elevator wing that obviously doesn't
have an aileron servo sticking out either side. By making the wing removable, the builder can fly the X250 either way. Of course
doing it your way, I sell another kit instead of just a wing, so maybe I should rethink all of this!
As for the power system you went with, let me know how it works out. With the
stock system we really do get 7 to 9 minutes of aerobatic flight and 12 to 15 minutes of just flying around at partial throttle. We
tried Astro 02 brushless motors with the super box and all we got was a little more vertical performance and half the flying time.
I'm really partial to the system we recommend because I think it's the optimum trade off between performance, flight time, and
total weight. I'll be really curious to hear how your system works out. With the standard system, one of our customers uses his
picnic table as a runway to take off and just lands in the grass.
By the way, thanks for the information on weights with and without covering. It
was something I meant to do but forgot to in the heat of building and taking the photos for the instruction manual.
I sent an email back to Larry asking about the rudder/elevator version,
and he responded with the following.
With the rudder/elevator version you don't join the wing halves with the joiners
inside the spars. Instead, you build each wing half and use a jig we provide to precisely set the root rib at the correct angle. Then,
we provide an angled fixture to go inside the spars and hold them at exactly the right dihedral angle. You glue the two wing halves
together and then wrap the center joint with fiberglass tape. It's easy and it's dead on every time without any wing twist.
The technique is overkill for the X250 because I assume an X250 builder has some
building experience, but it's the technique we're going to use in all the rest of our designs that have a dihedraled wing, so I wanted
to keep everything the same throughout the line.
I can't wait to get another couple of designs done. I want to finish our site first and
then I'll be able to turn my full attention to our kits again.
For even more on the building of Ken’s version of the X250 visit:
http://members.aol.com/KMyersEFO/x250.htm
Return to "What's In This Issue?"
 The Mid-America Electric Flies report is not actually in this
issue. To read the report click here. Use the back button
of your browser to return to this issue. The Mid-America Electric Flies report is not actually in this
issue. To read the report click here. Use the back button
of your browser to return to this issue.
Return to "What's In This Issue?"
To Reach Ken Myers, you can land mail to the address at the top of the page. My E-mail
address is:
KMyersEFO@aol.com
EFO WEBsite: http://members.aol.com/KMyersEFO/
| |
