| |
An Appreciation of John Sermos
By Hank Nielsen, 914-761-5998 email: hnielsen@aol.com
I must sadly report the passing on February 6 of a friend and fellow modeler, John
Sermos, who was well known to modelers as the president of Sermos R/C Snap Connectors, Inc. John was as much a pioneer of
the use of electric power in modeling as he was of the high-efficiency connectors in his name which have become a quality
standard in the field.
He was well known in the modeling field as a man of passion, integrity, and
professionalism. These qualities may have stemmed in part from his early training. Many people do not know that John in his
early career was a professional figure skater, excelling at one of the most demanding of all sports. During this time he filled
principal roles in productions at Center Theatre and at Madison Square Garden in New York. He also was a principal figure in
major ice skating venues all over the U. S. with the famed Hollywood Ice Revue, well known for such skaters as Sonia Henie,
Dick Button, Barbara Ann Scott, and other stars. Later as a dedicated instructor, he was active for many years at the
Rockefeller Center Rink in Manhattan and at the Playland Ice Rink in Rye, N. Y., teaching skating to hundreds of students.
The same professional qualities were brought to the R/C modeling fraternity in
1986 when he introduced the Sermos R/C Snap Connector. He became a familiar figure at major model shows in Pasadena,
Atlanta, Chicago, Toledo, St. Louis, Baltimore, the KRC, and of course his home club, the WRAMs (Westchester Radio Aero
Modelers) at their annual show at the County Center in White Plains, N. Y.
John was born in New York in 1930 and was an avid modeler from early
childhood. He was a graduate of Pace University and the University of Bridgeport. Serving in the U. S. Air Force for fours
years, he saw action during the Berlin Airlift. Among his community activities, John was involved in childrensí programs and
animal protection services, as well as other charitable work.
A resident of Stamford, Conn. since 1966, John was married to professional
musician Jean Graham Sermos.
Those wishing to make donations in his memory may contact the Central
Westchester Humane Society, Elmsford, N. Y., or Guiding Eyes for the Blind, Yorktown Heights, NY.
Return to "What's In This Issue?"
Keith Shaw Birthday Party/Electric Fun-Fly
From: Dave Grife email: grifesd@yahoo.com
Hi Ken,
My club voted 100% in favor for the Electric Fly.
I'm calling the 'event' the:
"Keith Shaw Birthday Party/Electric Fun-Fly"
The dates are June 1 and 2. At the Balsa Butcher's flying site in Coldwater,
Michigan.
The field will be available for flying Friday, May 31 for early arrivals.
Landing fee is $10.00 for one or two days.
Contest Director is Dave Grife. grifesd@yahoo.com or (517) 279-8445
I hope to have maps and hotel information available soon:
Holiday Inn -(517) 279-0900
Red Roof Inn (517) 279-1199
Return to "What's In This Issue?"
Bungee Launcher
By Michael Rogozinsky email: m.rogozinsky@sympatico.ca
Web site: http://www3.sympatico.ca/m.rogozinsky/homepage.html
Reprinted with Permission of the Author
This article was first published in the August 2001 Electric Model Flyer of
the Electric Model Flyers of Southern Ontario.
From Michael:
Please note the new Web site address of the Electric Model Flyers of Southern
Ontario http://www.emfso.org/
The Electric Model Flyers of Southern Ontario (EMFSO) is the largest and
oldest electric model flying club in Canada. We are a non-profit organization devoted exclusively to promoting and supporting
electric powered flight. Anyone interested is encouraged to join the club and share knowledge with fellow members of all skill
levels and focuses.
Thank you.
Michael Rogozinsky
Secretary of the EMFSO
Electric Model Flyer
AUGUST - 2001
ISSUE # 01 - 4
Editor: Al MacDonald
4-589 Albert St.,
Oshawa, Ont. L1H 4T2
(905) 576-0210
E-mail Al: almacc@home.com
Pedal/Bungee Launcher For Electric Jets
By Michael Rogozinsky
WARNING!!! This is an inherently and potentially dangerous tool, even
when used correctly. The builder/user will assume all responsibility for any harm or damage, and will use it at his
or her own risk. The author and EMFSO assume no liability nor responsibility for any mishaps. (Let's face it. In
this hobby we use high-amperage electricity, we play with high-powered motors that spin sharp propellers, we use
toxic glues, and we use plenty of very sharp and very hot tools. ALWAYS BE CAREFUL!) This project and tool is
not at all intended for beginners.
(From Ken Myers & the EFO - Again, this is a dangerous tool. Should
you decide to build it, you are totally responsible for itís safe construction and use. The Electric Flyers Only, Inc. nor
Ken Myers can assume any responsibility for the safe construction or use of this tool.)

The reason that I built this launcher, is that I find it hard to launch our Kyosho T-33
electric ducted fan. This plane needs speed as soon as it starts flying. It always took me 3 or 4 throws to get it flying. (Of
course other planes with no landing gear can be launched with this device. KM)
Many people are successfully using various types of launchers. I saw many
designs on the Internet, and finally made a compromise of several designs to get to this idea.
I got all the parts for this project at Home Depot, for under $60, not counting taxes.
I used good quality wood, but if went with cheaper material, it should work out the same.!!!
List of materials:
2 pcs 1/2" x 5 1/2" x 3 ft pine
2 pcs 1/2" x 3 1/2" x 3 ft pine
10 black drywall screws, 1 1/2" long
10 washers, about 1/16" thick, (the drywall screws should fit through these washers)
1 concrete nail, about 3" long (you'll have to buy a package)
2 bolt lock retainers (the part that a fence or door bolt lock slips through) that will accept a 3/8" diameter rod
1 3/8" 7" long bolt, and a matching washer and nut
2 large nails or stakes
2 packages (4 pcs) harness rings
25 feet of yellow latex tubing 3/8" outer diameter - 1/4" inner diameter.
a few feet of strong string
assorted medium or small nuts and bolts
Construction is simple if you understand how the bungee works. Essentially, by
pressing down with your foot on a hinged plank of wood, the plank of wood rotates on the hinge and pushes up the other end of
that plank. That end of the plank of wood pushes up and off of a nail a ring that is attached to stretched tubing. That ring is also
attached to a string and then another ring which is held tightly against a hook on the airplane. The reason the entire launcher
doesn't move forward is because it is also held in the ground with a stake or very large nail.

Base
Construction begins by drilling 2 holes. Drill a hole larger than the stakes or large
nails you have centered about 2" from the one side of each of one of the 1/2" x 5 1/2" x 3 ft planks of wood.
Then drill in the same plank at the opposite end, centered about 3" from the other edge, drill a hole just barely smaller than
the concrete nail. The plank with the two holes will be the base of the launcher. File the tip of one of the concrete nails and
carefully hammer it through the smaller hole. This will be where the ring on the stretched tubing will be connected to when
launching. The larger hole will be where the large nail or stake goes through to hold the base to the ground. (See the
"base.jpg" diagram)

Pedal
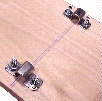
Mark a line across the other 1/2" x 5 1/2" x 3 ft plank 14 inches from
one end (perpendicular from the long edges). This will be the bottom of the pedal. Mark the position of two bolt lock retainers and
drill holes so they can be mounted. Mount these so that the screw is flush with the topside of the pedal. Make sure the 3/8"
bolt slides through these bolt retainers. (See the "pedal.jpg" diagram). A hole will be drilled later so that the pedal can
move up and down over the concrete nail.

Sides
Drill a 7/16" hole 14 inches from the ends of each of the 12" x 3 1/2"
x 3 ft planks, 1 1/2" from the side edges. The edge that the hole is closer to (1 1/2" from the edge) is the bottom
edge. (See the "sides.jpg" diagram).

Assembly
Hold one of the side planks along the base, so that the side bottom is against the
base edge, and drill a few pilot holes so that the sides can be screwed into the edge of the base (the concrete screw pointing up),
without splitting the wood. (See the photos.) After the pilot holes are drilled, screw drywall screws through the sides into the base
edged, BUT make sure to use 1/16" thick washers between the pieces of wood. This is so that the pedal will pivot between the
sides without binding. Repeat for the other side.
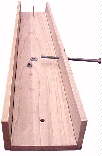
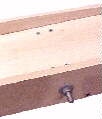
Carefully, holding the pedal over the base and between the sides (the holes in the
sides should be as near as possible to the bolt retainers), mark the location and drill a hole (about 1/2" diameter) where the
concrete nail will stick through the pedal. When this is done, mount the pedal by putting the 3/8" diameter bolt through the
sides and through the bolt retainers.
Hold in place with the nut and washer (This is to be removed each time the bungee
launcher is "staked" into the ground.

Latex tubing
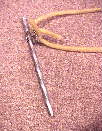
The 25 foot length of tubing is looped through one harness ring and tied together at the other end on another harness ring. One harness ring will be on the large nail or stake that will be planted in the ground. The harness ring at the other end will be pulled and stretched to an appropriate length and hooked onto the concrete nail that is sticking up through the pedal. (Be careful that the ring doesn't slip off and fly back and hurt someone.)
Make sure the stake or large nail is held in the ground with sufficient strength that it doesn't get pulled out and hurt someone.), Another harness string is tied with strong string, about 5 or 6" in length, from the harness ring that is held onto the concrete nail (obviously, do this before going to the field and setting up). Always check this string for wear. The harness ring on the end of the string is pulled gently (tight) and hooked onto a hook on the bottom of the plane's fuselage, just ahead of the wing.

Launching
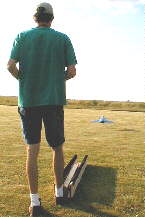
With your radio on (Tx and Rx) but throttle still down, make sure there is no one in front of you. When ready, gently step on the back of the pedal. The front of the pedal will move up and push the harness ring off the concrete nail. The plane will now be pulled forward. As it moves forward give full throttle. The length that the tubing should be stretched will vary from plane to plane. Test each plane conservatively. It is better to under-launch a few times than to rip your plane to shreds. As well, the launcher does not need to send your plane into space like a rocket; it only needs to get it moving forward quickly, and only a couple feet off the ground.
Each builder will have to make there own hooks on their planes as needed. If you see me flying anywhere this summer, you are welcome to try my launcher (at your own and your plane's risk of course). Have fun flying and please be careful. If you have any questions or comments, email me. You can email me through my own website at http://www3.sympatico.ca/m.rogozinsky/homepage.html
 Return to "What's In This Issue?"
Upcoming Meets
Tennessee Electric Fly 2002
From: Craig Logan jclogan@charter.net
The Coffee Airfoilers of Tullahoma, TN will be hosting the 3rd annual Tennessee
Electric Fly on Saturday June 8, 2002 at the Airfoilers Field adjacent to Arnold Air Force Base. This is a growing event that
draws folks from Tennessee, Alabama, and Georgia. New for this year, we plan to have an informal indoor flying session at
the D.W. Wilson Recreation Center gym in Tullahoma, TN the Friday night before the outdoor event at the field.
Contact Craig Logan, CD at 931-728-5446 or
jclogan@charter.net.
See our web site www.cafes.net/herb
for event info, map, and to learn more about the club.
2002 Land of Lincoln E-Fly
From: Tim McDonough tim@mcdonough.net
The 2002 Land of Lincoln E-Fly will be held the weekend of June 22, 2002.
Additional details will be available soon on the Knights of the Air RC Club's web site:
tim.mcdonough.net/knights.htm
This years format will be slightly different from past years. Saturday, June 22nd
will be "electrics only" as in past years. This is the day of the official AMA Sanctioned event.
On Sunday, June 23rd, we invite all of our electric powered friends to stay over for
an informal SMALL (Small Airplane Lovers League) style event. This means that electrics should be limited to "15"
sized motors and under, rubber powered planes of any size may be flown, and small glow or diesel powered planes with a
displacement of .25 or less may be flown.
The format of both days is "just for fun" with no competition events. As usual we
will have food, soft drinks, and water available both days.
5th Annual 2002 River Valley Flyers Electric Fun Fly
From cjbenner cjbenner@tznet.com
Wisconsin Rapids, Wisconsin: For the fifth annual 2002 RVF electric fun fly we are expecting it to be bigger and
better yet, and hope many of you reading this will consider attending. Our event is held this year on June 8 and 9, with Friday the
7th to be open to early arrivals. In 2001 we had more than forty pilots registered even though they were predicting bad weather
for the weekend, so come and join your friends--including those you haven't met yet . Checkout the River Valley Fliers
web site first at www.rvf-rc.org or E-mail me at cjbenner@tznet.com
for more information on the 2002 R.V.F electric fun fly. See you there?!
Southeast Electric Flight Festival
From: Jeff Meyers jsmeyers@earthlink.net
Our club (The Fayette Flyers of GA) would like to invite you and your comrades to our event in Atlanta, GA. During June 21-23, a good time is guaranteed. While this is our first stab at hosting a large regional event, we are expecting a great crowd of pilots and vendors.
Our event website is at the following address:
www.koolflightsystems.com/seff.htm
I know Atlanta is a long way from home for you guys...but we would love to have
you down our way.
WMAA Electric Fly-in
From: Kevin Petrilla petrilla.3@osu.edu
The WMAA (Westerville, Ohio, just outside of Columbus), will be holding its
second electric only fun fly on August 3rd this year (tentative). The turnout last year was impressive, considering I didnít push it
too hard. Hopefully we can make it even bigger. Thanks again for your support.
Web site: www.wmaa-wags.org
Return to "What's In This Issue?"
4th Annual R. V. F. 2001 Wisconsin Electric Fun Fly
From: Chuck Benner cjbenner@tznet.com

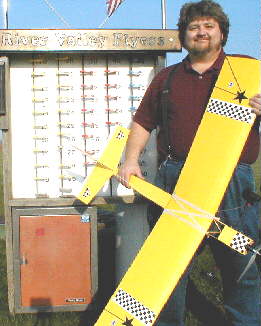
It was another great electric fun fly put on by the volunteers from River Valley
Flyers of Wisconsin Rapids, Wisconsin on June 2001. On Friday morning the volunteers started to set up the flags, signs,
concessions and radio impound tent in anticipation of the fliers that would be arriving soon. At around 1 P.M. the first fliers and
vendors started to trickle in. The weather was perfect this Friday as early arrivals were getting their planes out and starting to fly
in light breezes and sunny skies.
At about 8:45 P.M. Friday evening, we held a potluck cookout with steaks, brats
and all the goodies that go with it, with lots of thanks to Helmut and Ziggy of Dymond Model Werks and Dave Beck for the
steaks. With everybody's tummy full, and the energy level restored we said, "Let's night fly". Helmut, from Dymond, broke out
the chemical light sticks to tape on the wings and fuselage of airplanes and we started to fly that night until 11:00 PM, and had
great fun. One nice thing about our meet is that you can camp at the flying field which makes having the cookouts and night
flying possible without having to waste an hour of packing up traveling to the hotel and going to dinner.
This year camper trailer rental was possible through Lake Country RV from
Wisconsin Rapids, which also loaned us the nice enclosed trailer for storage. A lot of the flyers had said they would like to rent a
camper for next year, so if you plan to attend the 2002 RVF electric fun fly, remember to reserve a trailer early if you are not
bringing your own. You are welcome to bring or rent a generator, and rented campers are set up in advance so all you need is
your gear and a sleeping bag. There will also be blocks of motel rooms reserved for those who prefer traditional
accommodations.
One thing I love about these fun fly's is making new friends and seeing old friends
from flying clubs around the Midwest.
This year as I walked around and greeted the people, I found a wide interest in
different type of aircraft. There were at least three helicopters and one of those helicopters was power by an Astro 60 size
electric. Another pilot was tearing up the sky with his helicopter doing 3-D aerobatics including inverted hovering, loops, roles and
flying backwards at high speeds. There were large planes like the large 60 size P-51 and the quarter scale J-3 Piper Cub. I also
saw the high-performance gliders called hot-liners. These gliders have a tremendous climb rate and wide speed range of probably
100 mph+. These highly aerobatic planes go past the flightline at high speeds, just whistling through the air sounding like a jet.

Dave Beck joined us again with his FAI record-setting solar powered airplane with
telemetry called "Solar Solitude". This is a very impressive aircraft with a lot of capabilities. Every upper surface of
this aircraft was designed to hold solar cells. At this meet, he had new longer 120 inch wings that he was trying out, but
unfortunately he had not installed the solar cells on the wings yet. With all of the solar cells in place Dave can fly this plane
without any batteries, flying on solar power alone. He can also fly this plane with lithium batteries when he is flying for solar
powered battery-assisted FAI records. His telemetry includes GPS moving map display on one laptop computer, airspeed,
heading, course, course deviation, altitude, air temperature, signal strength and solar array output on a second laptop computer,
and of course a video downlink so he can fly by just watching a portable TV with the two laptop computers next to it. For more
information go to Dave Beck's web site for more information at http://personalpages.tds.net/~dbeck
We are hoping to attract other pilots with solar powered aircraft to our 2002
electric meet and to make this the "electric meet to come to" for solar powered R/C aircraft! We would also like to
invite those people that have electric Ornithopters (flapping wing propulsion aircraft) to this meet and remember we will also be
night flying.
In the last four years I have seen more duration in flight time because of better
batteries and motor design. Better quality kits and ARFs can be purchased in more of the mainstream hobby catalogs and shops.
I have also seen more use of high performance buggy motors like the Magnetic Mayhem, cobalt motors, brushless
high-performance electric motors, new hi performance NiCads, nickel metal hydride, lithium batteries and graphite composites for
strength in the wings, fuselages, propellers and let's not forget the ingenuity, foresight and willingness to help other pilots in this
great hobby.
Having vendors at this meet really helps everybody. People not only can see the
planes fly, but they can also buy E- planes or parts for electric R/C aircraft. This year we had five vendors, Dymond,
Hobbyhorse, Specialized Model Supply, SRE R/C and Bert Olson selling Aveox brushless motors and other electric R/C
equipment.
Saturday's weather was beautiful, light breezes again and partly cloudy with most
of the clouds going around us!
This year we had a real Bell helicopter land near the field and the pilot gave rides
for $20. Many R/C flights were made throughout the day and everybody flew safely, and there were no mid-airs--great job
everybody.
At about 8:30 P.M. we had the Saturday potluck cookout, thanks again to Helmet
and Ziggy of Dymond. Ziggy really did a lot to make this a great potluck, she set tables, washed dishes, cooked food, and made
sure everybody had something to eat both Friday and Saturday--Thank you Ziggy.
Again it was time for night flying. This time the helicopters came out to play after
dark. More light sticks, more aircraft and fun throughout the night until about 11:30 P.M., and then more hanger talk and star
gazing until 1 A.M.
"Shared knowledge and friendships what else is a fun fly
for?"
Sunday, the pilots were flying again early but the day was turning cloudy and is
promising rain showers as the morning progressed, rain and thunderstorms set in, no problem because everybody had flown so
much Friday and Saturday that Sunday turned into a large hanger flying session. Even though it was drizzling, most pilots stayed
until at least noon to talk to friends.
Overall this was a very successful RVF electric fun fly with many pilots and many
more flights, shared knowledge and friendships. What else is a fun fly for?
Charles Benner
River Valley Flyers Wisconsin Rapids WI
 Return to "What's In This Issue?"
The Serial Marrying of Packs
By Ken Myers
Many of us tend to use "purpose" built packs for each plane. Weíve
managed to muddle through the soldering of cells into the type of pack that we desire for the purpose. Sometimes, though, itís
useful to serially join existing pack. Such instances may be:
The inability to solder cells into a pack, so that we need to purchase pre-made
packs of six or seven cells.
The inability of our charger to charge the number of cells weĎd like to use in a
project.
The ability to "break apart" or "join together" packs for use
in other planes we are currently flying or intend to fly.
VERY IMPORTANT! The packs MUST be identical in
manufacturer, chemical make-up, mAh and date of manufacture. If your packs meet this criteria, then you may proceed.
Step one: Gather together the packs and tools youíll need. While the photos show only two packs, more can be
joined serially. The tools include: soldering iron, Sermos or Anderson Power Poles, wire stripper and/or wire cutter.
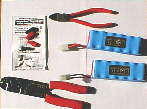
Step two: One at a time - NOT AS SHOWN IN THE PHOTO - cut a lead from the cheap
supplied connector. Solder the connector to the bared wire end of the free wire. Install the connector housing. Cut the other
lead from the cheap supplied connector, and repeat with the other connector and housing.

The photo shows the connector soldered to the black wire. The photo
incorrectly shows the red wire hanging free. This is a no, no. It should still have the cheap supplied
connector attached!!!
Repeat this process for each pack that will make up the final battery configuration.
Step three: connect the connectors between the packs in series, red to black. Yes, red to black. This is
a series connection.
Step four: Sermos or Anderson Power Poles allow the housings to be "joined" side-by-side with a slip
fitting. Slip fit the red housing from the first pack in the series to the black housing of the final pack in the series. DO NOT
CONNECT THEM TOGETHER ELECTRICALLY!!! The new, bigger battery is finished and ready for installation. The
separate packs can be Velcroed or taped together, or they may "fit" in their own slots or compartments in the
aircraft.
Study the photo below very carefully so that you do this step correctly.
Mishandling battery packs can be EXTREMELY dangerous. Think before you act!

Note that the black lead from the bottom pack attaches to the red lead in the top
pack. The red lead in the bottom pack and black lead in the top pack are side-by-side and ready to make the connection to the
ESC (Electronic Speed Control) connectors.
Return to "What's In This Issue?"
News from Bob Aberle
From: BOB ABERLE, 33 FALCON DRIVE, HAUPPAUGE, NY 11788-1204 or E-Mail:
Bobaberle@aol.com
Watch for two new efforts on my part. The first will be an 18 page piece titled,
"THE STATE OF THE SPORT -- IN ELECTRICS" a complete history and status of electric powered flight. It will
appear in upcoming APRIL 2002 issue of MODEL AVIATION.
Also I have a new book coming out before Toledo time as follows:
Getting Started in Backyard Flying
By Bob Aberle
Published by Air Age Inc., March 2002
"A comprehensive guide to miniature electric R/C airplanes, from park and home flyers to indoor R/C"
The book covers these areas and more:
Choosing your airplane
Motors and speed controls
Propellers and drive systems
Batteries and charging
R/C systems and installation
Measuring motor parameters
Matching motor systems to your aircraft
Connectors, wires and soldering
Three easy-to-build project kits (one RTF and two ARF models from start to finish)
Flying for the first time
Flight safety issues
Examples of how to improve performance
Sources for more information (publications, columnists, books, etc.)
National organizations
Hobby Trade Shows and E-FLYS and much more!
It will likely be around 100 pages, with many photos and diagrams. 8 1/2 X 11
format, with a tentative list price of $15 to $20.
You gotta start getting more "small stuff" in AMPEERS!
Thanks Bob, Iíll be looking forward to both! As for more "small
stuff" in the Ampeer, thatís up to the readers. Hey folks, got something you want to share about "small
stuff", just get it to me via email or postal mail. KM
Return to "What's In This Issue?"
To Reach Ken Myers, you can land mail to the address at the top of the page. My E-mail
address is:
KMyersEFO@aol.com
EFO WEBsite: http://members.aol.com/KMyersEFO/
|
|


