 |
Flying High With Electric Power!
The Ampeer ON-LINE!
Fly the Future - Fly Electric! |
|---|
Site Table of Contents
| President: | Vice-President: | Secretary-Treasurer: |
| Ken Myers | Richard Utkan | Rick Sawicki |
| 1911 Bradshaw Ct. | 240 Cabinet | 5089 Ledgewood Ct. W. |
| Commerce Twp., MI 48390 | Milford, MI 48381 | Commerce Twp., MI 48382 |
| (248) 669-8124 | (248) 685-1705 | (2480 685-7056 |
 | ||
| Board of Directors: | Board of Directors: | Ampeer Editor |
| David Stacer | Arthur Deane | Ken Myers |
| 16575 Brooklane Blvd. | 21690 Bedford Dr. | 1911 Bradshaw Ct. |
| Northville, MI 48168 | Northville, MI 48167 | Commerce Twp., MI 48390 |
| (248) 924-2324 | (248) 348-2058 | (248) 669-8124 |
| The Next EFO Flying Meeting: Date: Saturday, May 13 Time: 10 a.m.
Place: Midwest RC Society 7 Mi. Rd. Flying field | ||
| Build the Award Winning 1/6-Scale Mooney Mite Learn where to get the plans for this great looking, good flying plane. | An Editorial: Grumman F8F Bearcat, Construction Article, Model Aviation, April 2017, p. 36 Ken shares his OPINION on why this construction article did not provide the same kind of basic info available in Denny's construction article. |
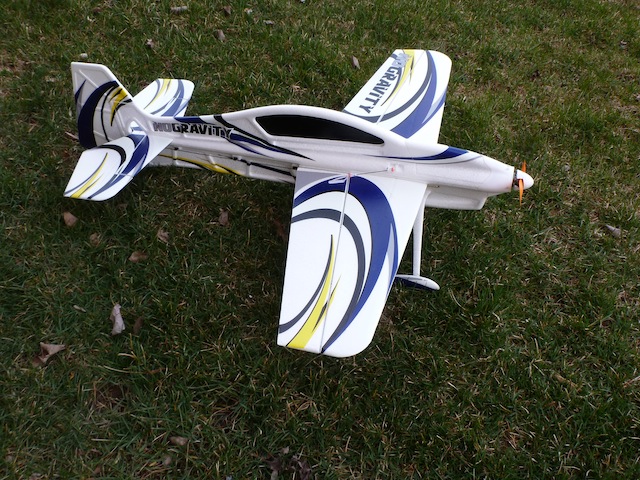
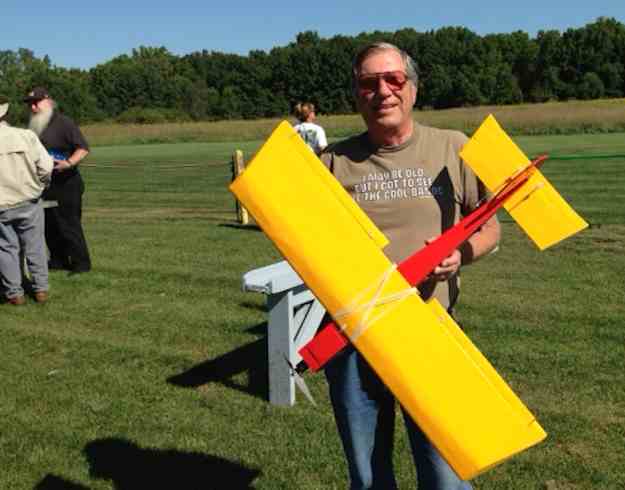
| A TechOne No Gravity Review Joe Hass reviews this thrust-vectored 3D fun flier. | Ken Myers' Dollar Tree Foam Board (DTFB) Ugly Stik Ken describes and gives some details of his Dollar Tree Foam Board Ugly Stik. |
| Upcoming Watts Over Wetzel Upcoming Electric Fly-in announcement. | Upcoming Keith Shaw Birthday Party Electric Fly-in 2017 Upcoming Electric Fly-in announcement. |
| A Flite Test Pietenpol Aircamper Ken Sulkowski shares some photos and information on his version. | Another White Sport, an I-75 sign & a Slow Cub Ken Sulkowski shares three more planes with photos. |
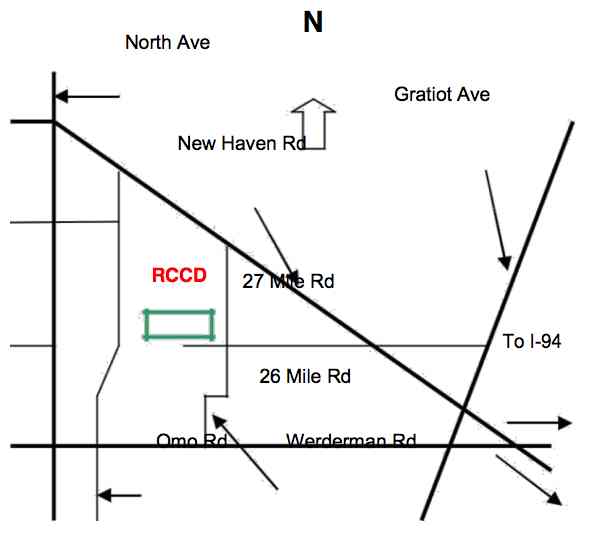
| The 2017 33rd Annual Mid-America Electric Flies Links to this year's flyer and map | |
News From Denny Sumner 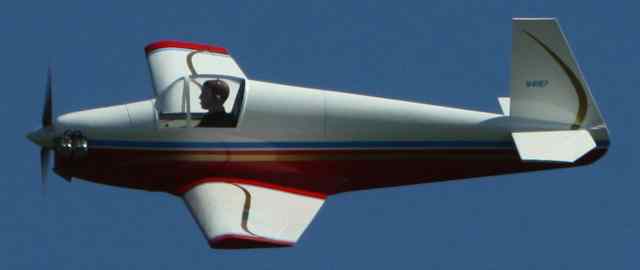
CJ Wysocki photo from the 2016 Mid-Am The designer of this plane is EFO member Denny Sumner. He began the build Nov. 1, 2015 and it was ready for the Toledo RC Expo the following April. His build thread on RC Groups is here. The construction article appears in the June 2017 Model Airplane News. The article starts on p. 83. The Mooney Mite received 2nd place in non-military sport scale at the 2016 Weak Signals RC Expo in Toledo, OH. 
Mark Rittinger photo of Denny with his Toledo Show Award Denny was presented with Sunday's Best Scale award at the Mid-America Electric Flies in July of 2016. The plans to build this retractable landing gear civilian aircraft are available from AirAge Publishing. Model Airplane News did a nice job in presenting quite complete and useful information about the prototype model. Specifications from page 84 of the article
Gear Used
One very useful thing in Denny's article was that he gave the recommended throws in degrees instead of inches or fractions of an inch. It doesn't matter where you take the measurement on a movable surface, the degrees will always be the same. The article also noted that, "With the Scorpion motor installed, it delivers 33.5 amps using 391 watts, for 111.7 watts per pound." For someone looking for something a bit different, with retracts, that is not a war bird, this could be the project for you. I highly recommend that you check it out. I was quite pleased with the information presented by the magazine in the construction article. There were only two things missing that I would have liked to have seen presented. The first was the wheel diameters and brand, which also isn't mentioned in Denny's build thread, but probably present on the plans. The second was the easily computed wing cube loading factor, which is 11.7. That puts it just barely into the advanced sport plane category for flyability. An Editorial: Grumman F8F Bearcat, Construction Article, Model Aviation, April 2017, p. 36
Compared to the construction article of Denny's Mooney Mite, the construction article for this plane was lacking in several decision making details. Specifications from p. 37
Nowhere in the article does it state the wing area. For the wing loading is it 6 pounds times 16 ounces (96 ounces) divided by 23 oz./sq.ft.?
Therefore, according to the given specifications, the wing area is between 575 sq.in. and 800 sq.in. What is it? That does make a difference. The article notes the motor as a Power 60. Was it an E-flite brand? If so, which Kv? The E-flite Power 60 comes in two different Kv values. The Sources, listed at the end of the article, did not include Horizon Hobby. The specifications just noted only a .60-size brushless motor? What is a .60-size motor? Rimfire 60: 268g, 650Kv, rated to 65A, recommended prop for 6S - 12x6 E-flite Power 60: 380g, with two different Kv available
Hobby King Turnigy G60: 360g, with three different Kv available; 300Kv, 400Kv & 500Kv,
Power Up 60: 408g, 380Kv, rated to 60A, recommended prop for 6S 15x10 through 20x8 Power Up 60 Sport: 408g, 430Kv rated to 80A, recommended prop for 6S 17x10 through 20x8 Those are just some of the many .60-size motors available. .60-size means absolutely nothing, as noted in the specification table on p. 37. Having a good amount of 'overhead' amps for the ESC is a very good idea, but is an 80-amp or 90-amp necessary? What was used on the prototype? What was the amp draw with the recommend FMS 4-blade prop? Watts in? There is a link given to the designer's build thread on RC Groups. Unfortunately, the information presented there is not that helpful either. "The proto uses a 50-60 350kv motor, 80-90 amp ESC, and 6s 5000 mah pack. The 4-blade propeller was from FMS's 1700mm P-47, and main gear struts and tail wheel retract from FMS's 1700mm P-51. The main gear retracts are standard 90 degree 3.5kg units but 85 degree would also work." As previously mentioned, the article notes a Power 60 on p. 36 without noting the Kv value. The build thread notes a 50-60 350kv motor, whatever that is. What's the point? Model Aviation needs to do a much better job at providing basic, useful information in their construction articles. No one is prefect, but I believe Model Aviation could do a much better job of providing useful information. Is this newsletter free from errors or omissions? Absolutely not!!! In the April issue, I did not originally have a direct link to the video of how the canopy was built for nerdnic's P-39, which I said that I thought was pretty neat. I went back and changed the general link to a direct link in the video, thanks to a sharp-eyed reader's input. In the February 2017 issue I had a graph, and I also implied in my text, that is was for battery interenal resistance at various voltages for ALL lithium based cells. Again, thanks to a reader, I did some further research and found out that that graph only applies to A123 cells and NOT to LiPo cells. The graph was redone to note that it is representative of A123 cells and the text was updated. You'll probably find more errors in this issue as well, but that's what I have you, the 'readers' for. I truly appreciate your input! A TechOne No Gravity Review
My XFC and 3D pilot son, Chris, introduced me to the No Gravity. It is available in red or blue, from Tower Hobbies. It was one of those airplanes that instantly became a "must have", especially when I understood that for the $120.00 price tag you got all the servos, ESC, motor AND right / left Thrust Vectoring. I placed my order. I only had a little bit of time on the day it arrived. When I opened the box to grab the instructions, I found that everything was stacked vertically in a molded foam carrier. Neat! I found the instruction book and took it with me on a business trip. Based on the instructions I was expecting to install the servos, motor and thrust vectoring unit. I was pleasantly surprised to find all of those tasks completed. The instructions call for assembling the wing and horizontal stab before completing the control surface linkages. A quick study of the actual bird showed that it would be a lot easier to put all of the pushrod clips and pull - pull hardware for the rudder in first. There was no mention of what adhesive to use, so I used thin foam safe CA to attach the wing, horizontal stab and the various braces. A shot of kicker quickly held everything in place. There is way too much throw for the rudder with the recommended set up. I recommend that the attachment point for the pull pull lines be moved in a bit. 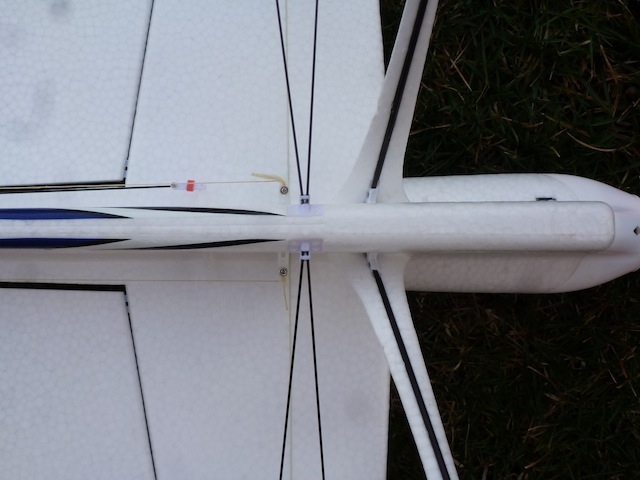 In fact reversing the location of the line tie down screw and the line attachment will give you just about the right amount of rudder throw. 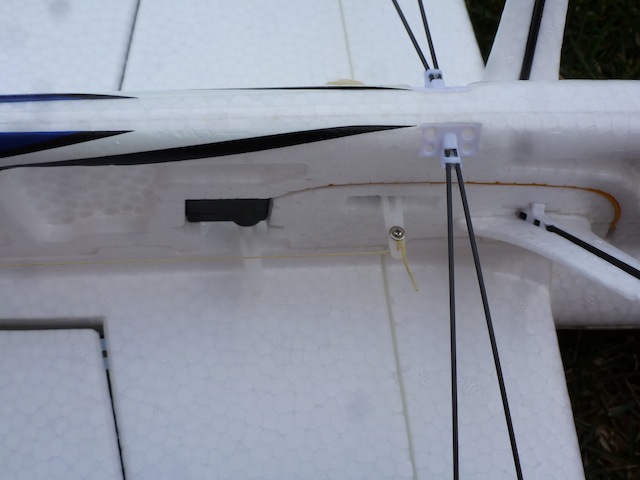 I had to go into the Tactic TTX850 transmitter and reduce the throw to below 50% on the rudder to make everything work when set up per the instructions. I programmed the thrust vectoring servo to follow the rudder as well as using a switch on the transmitter so that I could turn thrust vectoring on and off. The instructions call for the receiver to be below the 3S 450mAh LiPo battery. I could not see any way that would work regardless of what receiver I used. I pulled the case off a Tactic 6-channel receiver and slid it vertically behind the battery (see picture).  I studied the thrust vectoring assembly and determined that there was interference between the pushrod connectors and the battery hatch. I solved that problem with a combination of removing a bit of foam from the hatch and bending the thrust vectoring servo arms down a bit. A further look showed that the thrust vectoring pushrods were rubbing against the thrust vectoring unit. A little surgery opened up the holes and took care of that problem. The prop is held on with o rings. The spinner has a centering rod. Foam Tac was the only adhesive that would hold the spinner to the prop and still be removable to replace the O rings. With my Tactic TTX850, I have the ability to set up each flight control surface on a separate 3 position switch. High rate had maximum throw with 50% expo. Low rate was 50% throw with 30% expo. The instructions specify a center of gravity (CG). It took 1/2 ounce of lead to get the CG at the recommend position. Yikes! It felt like I doubled the weight of the completed aircraft. 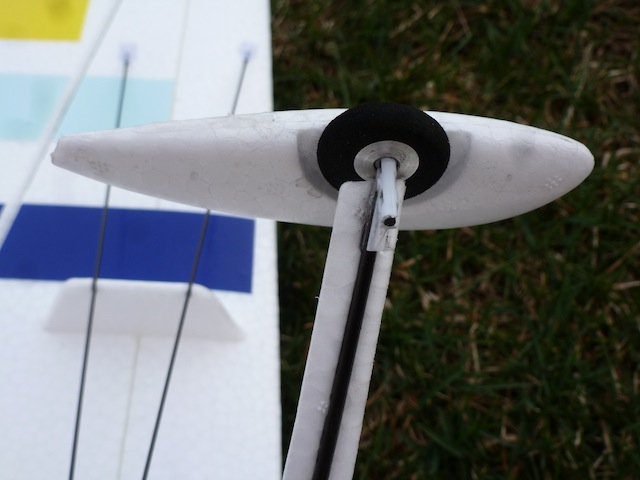 The first flight was indoors at Ultimate Soccer Arenas at low rate. Even with the small wheels and wheel pants the No Gravity quickly lifted off the artificial turf and required lots of up trim. In short, it flew terribly. I landed and removed half the weight.This was better. I removed the rest of the extra nose weight and the No Gravity was perfect in the air. The CG now resides 1.25 inches behind the plastic spar, well behind the recommended position. As I continued to fly it, I thought about adding back a bit of nose weight but decided to let Chris fly it. He flies his 3D aircraft with the CG very aft. He loved the way it flew so I will simply learn to love it too. Actually there are distinct advantages to an aft CG when doing 3D. The aircraft is very neutral in rolls and knife edge. The aft CG is especially helpful with thrust vectoring in knife edge. I experimented with knife edge loops on low rate with reasonable success. It was when I switched to high rate on rudder that this bird really came alive with thrust vectoring. Knife edge loops are an absolute blast. Flat turns in level flight are amazing. With all the control deflection any maneuver you can think of is possible. I did have a problem with the thrust vectoring servo. It is the same type of servo as the rest of the control surfaces. The gears stripped. This could be a "one off" failure or because of all the aggressive flying. I replaced it with a Hitec HS 56HB. I also changed to Dubro Micro Easy Connectors for more clearance with the hatch. The Hitec servo was an easy fit and has a more durable gear train. 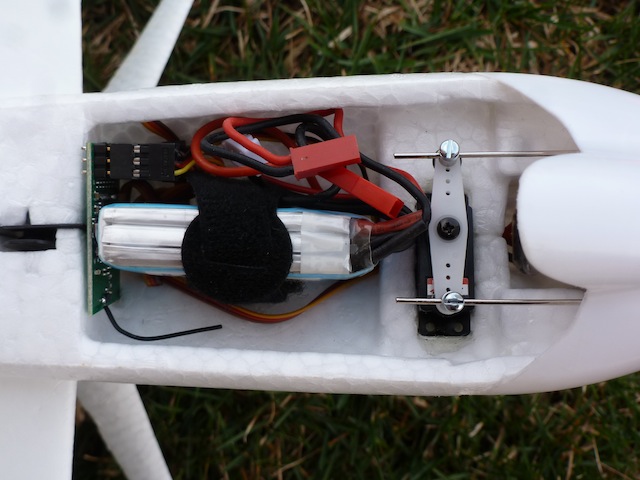 It can certainly be built as the instructions indicate, but an experienced builder will have no problem reading through the instructions for an easier way to assemble it. The most disappointing thing was the incorrect CG. At 11.5 ounces, flying indoors or out is easy. The more I fly the No Gravity the more I like it. With the thrust vectoring it takes very little room to fly. It is durable as I have had my share of "oops" trying low level 3D. The price point is excellent. Give it a try. Joe Hass 248-321-7934 Ken Myers' Dollar Tree Foam Board (DTFB) Ugly Stik
I thought now was a good time to share this plane to encourage folks to build not conventional material planes for the Mid-Am's new event and award, which has been noted on the current Mid-Am flyer. The little Ugly Stik uses the proportions of the original Phil Kraft Ugly Stik. It features a true Clark-Y airfoil. It flies well and was easy to build. Airframe Specifications:
Power System:
Radio System:
Videos:
Upcoming Watts Over Wetzel Radio Control Club of Detroit
(12th Annual RCCD Electric Fly-In)
Format: Fly-In - Electrics only, any size (110V power available for charging)
Ample parking, Food & Refreshments, Raffles, Limited bleacher seating available. Sun Shades Suggested, Vendors on site. Pilots Prizes #1: All registered pilots will receive one ticket, good for a chance at one prize each. You do not have to be present to win, but must make arrangements to pickup your prize. Michigan Recreation Pass required for Park access Co-CD's
Follow and Like us on Facebook Return to "What's In This Issue" Upcoming Keith Shaw Birthday Party Electric Fly-in 2017
The Balsa Butchers are hosting the "Keith Shaw Birthday Party Electric Fly-In", for the 16th year, at their field near Coldwater, MI. The event takes place on Saturday, June 3, 2017. It is a one day event again this year. The event consists of Open Electric Flying with a "Special Guest of Honor Theme". Enjoy a day with the "Pioneering Master of Electric R/C Flight". 8 am - 5 pm Saturday, $15 landing fee. For additional information contact;
The field will be open for guests to fly on Sunday as well. 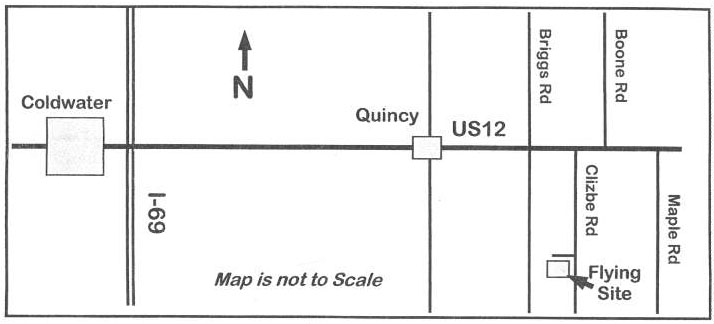 Directions: Quincy is approximately 4.5 miles east of I-69. Clizbe Road is approximately 1.6 miles east of Quincy. The Flying site is approximately 1.5 miles south of US-12 on the west side of Clizbe Road. A Flite Test Pietenpol Aircamper
Ken, I enjoyed reading about the Flight Test Sea Duck (in the April issue). There is a good test flying video of the model on the company's website. I am thinking about building their Guinea Pig. The program will take place upstairs on the mezzanine of Ultimate Soccer Arenas near Field 2 and the bar. We will be using Field 2 for product demos! 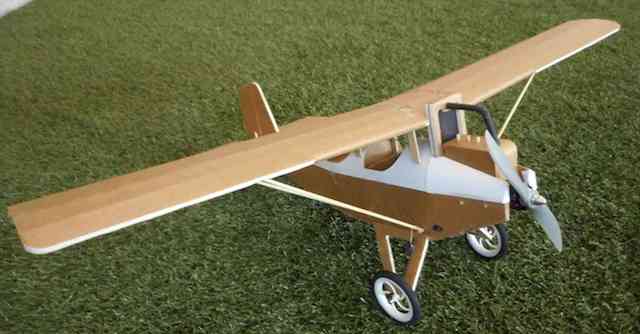 I finished their (Flite Test's) Pietenpol Aircamper about a month ago and it flew beautifully right off the drawing board. A bonus are the 3-D files included for the model; an engine block and radiator. My son has printed mine and I'll get them on Sunday. 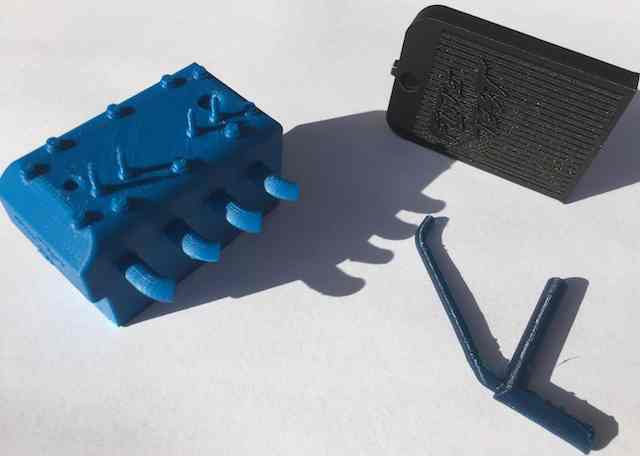 The model is totally constructed with a hot glue. All I have is a cheap hot glue gun. It was a little difficult to use. I think I'll buy buy the recommended glue gun if I build the Guinea Pig. It looks like it has a smaller nozzle and lays down a finer bead of glue. Although it's not necessary it would make to build easier. However it can be built with a cheap glue gun. Looks like a good one for our not conventional materials categories at the Mid-Am this year. Thanks for sharing. KM Another White Sport, an I-75 sign & a Slow Cub
Again, thanks for the newsletter. 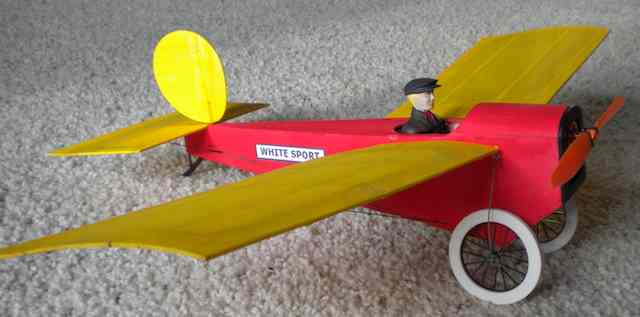 After reading about Richard Utkan's White Sport I remembered mine. It's not the greatest flying machine, but it is fun to build and to fly indoors. I have since put a hat on my pilot and got him to sit still long enough for a picture. 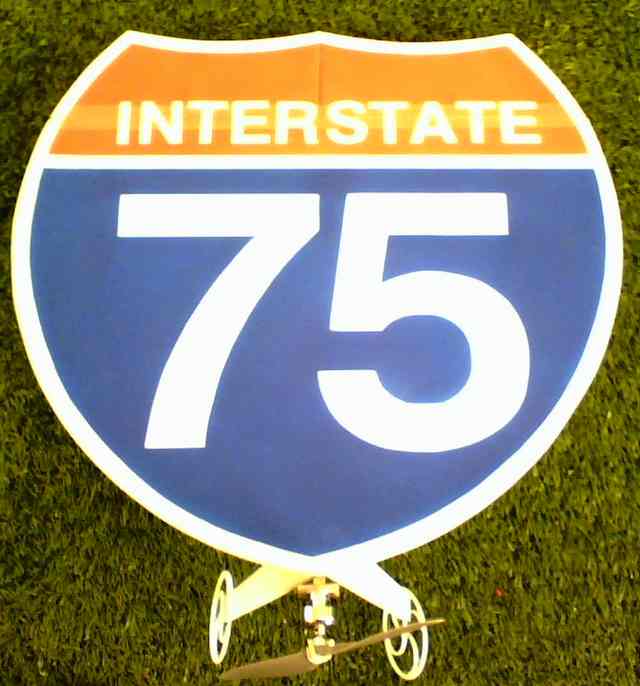 Also attached is a picture of something I got to fly, an I-75 sign.
I was really surprised when I opened the March 2017 Ampeer and saw a red and white slow cub. Attached is a picture of the one I've been flying for the last month or so at the arena. I enjoyed watching Rodger fly his so much that I just had to have one. It's just a fun little flying machine. 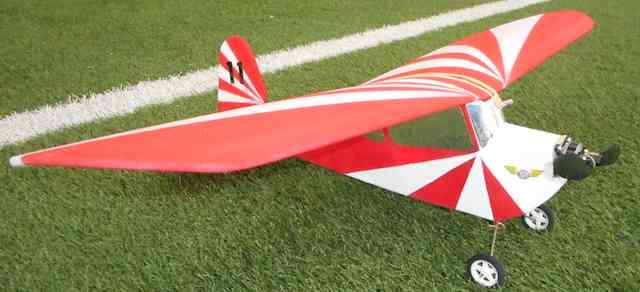
Return to "What's In This Issue" The 2017 33rd Annual Mid-America Electric Flies This year's event takes place on July 8 & 9. The flyer has all the information about the event, and the map and hotel list contains information of the location of the event an area hotels. To Reach Ken Myers, you can land mail to the address at the top of the page. My E-mail address is: KMyersEFO@theampeer.org |
