Note: The black and white photos are from the #86559 MICRO-MINIATURE CONNECTORS instruction sheet. The instruction sheet can be found online and a paper version is packaged with the connectors. My first attempts at using connectors failed because I felt that the chosen connectors were too bulky and/or too difficult to use. Connectors That I'd Previously Tried:

Conrail with JST connector to battery boxes in gondola The end result was that the leads from the locomotive were "hard wired" to the battery box leads. They were run that way for many months. 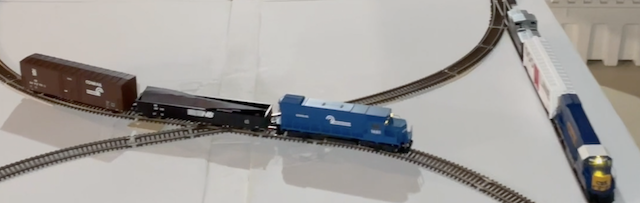
Both locomotives are running with "hard wiring" in this photo. Note, in the photo, that the battery car for the Conrail is a gondola and for the CSX it is the Soo boxcar, and they were "hard wired" together at that time, as I had not found any good connectors. 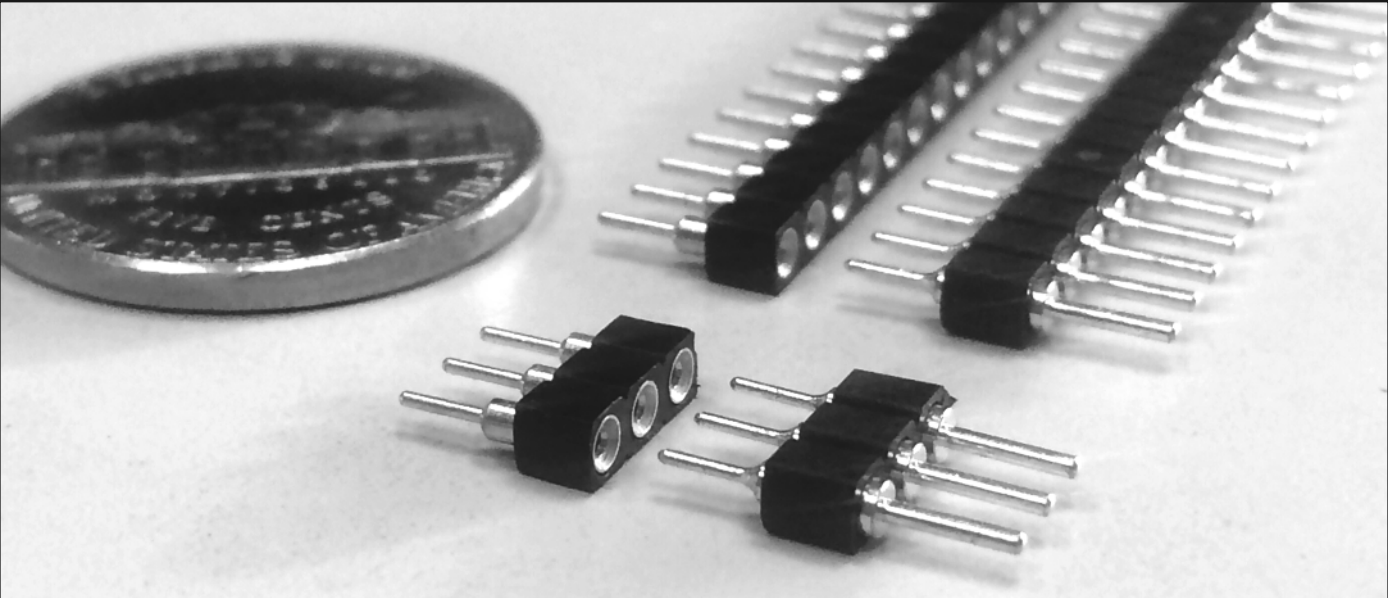
The USA nickel coin gives an indication as to the MicroMark Connectors' size. During my quest for a decent connector, I'd become aware of the MicroMark 32-Pin Micro Connectors. Near the end of September, 2022, I decided to give them a try as I wanted to be able to switch the battery cars around and also have one more usable piece of rolling stock if only one locomotive was being used. As it turned out, these were exactly what I was looking for. They are easy to use, and solder. 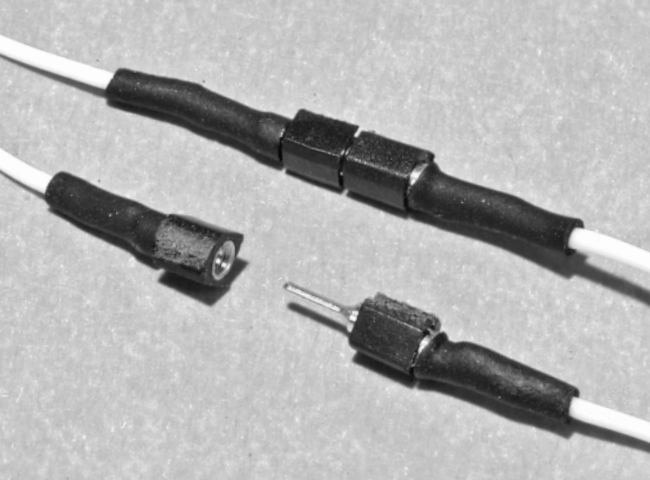
This is the way I used them. I did not use them in pairs, but as individual connectors. Doing that allows only a very small hole to be drilled in rolling stock, like the gondola. 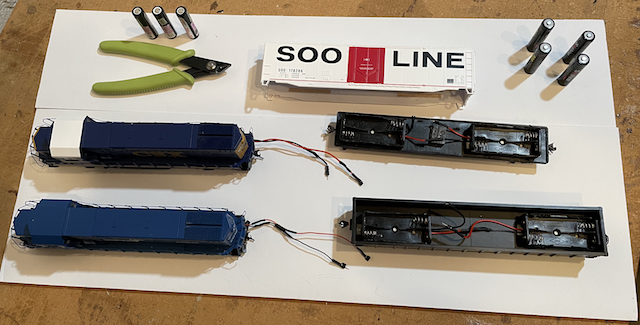 The photo shows the batteries, battery cars with the battery boxes installed, locomotives and fine-tipped cutters used to separate each connector from the strip of connectors. I am very satisfied with this product and recommend them. The only downside, for me, was that neither the MicroMark product page nor the connector instructions have a maximum current carrying ability or wattage noted. The instruction sheet does provide a hint when it states, "You can even stack two 4-pin lengths to make a standard 8-pin DCC decoder connector...". I believe that these connectors are fine for most HO applications, but that other connectors might be better for S-scale, O-scale and other larger scales. The Conrail and gondola had their connectors added first. Luckily, my wife makes jewelry. She had a couple of fine tip cutters to choose from. Fine tip cutters can be found online using the search term fine tip wire cutters. 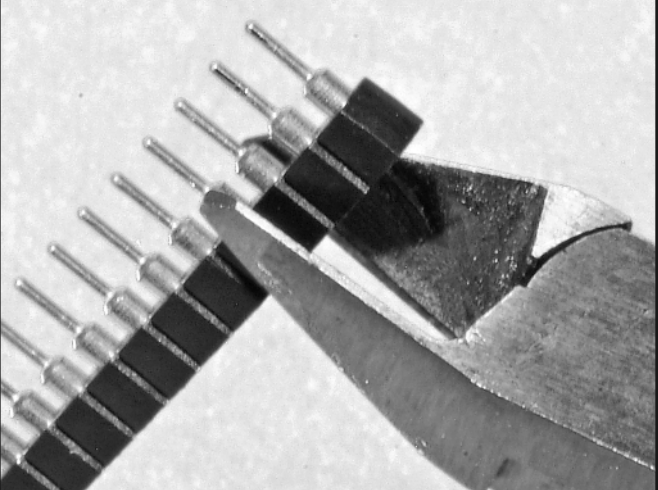
Be careful to cut in the grooves between the individual connectors. To keep the cut off connector from "disappearing", do the cut off inside a plastic bag, like a plastic grocery bag. Also, be careful and use only the tips of the cutter to carefully separate the connectors along their groove. Cutting too deeply exposes, and ruins, the neighboring connector. Don't ask! The gondola's battery boxes were set up for use with three Efest IMR 10440 size, 350mAh batteries, therefore the rear battery box, that had been modified to use only one of its slots, was removed and a new, "de-winged" battery box was connected so that four Soshine IFR 10440 size, 280mAh batteries, ordered from Amazon, could be used.
I can still use the Efest batteries as the Soshine IFR batteries came with two connector batteries, that are just basically connectors in the shape of a 10440 size battery. The battery size connector can be in one of the four slots of the battery boxes when using three Efest IMR batteries. The battery boxes were removed from the gondola to make them easier to work with. The wires were easily soldered to the connectors once the "hard wiring" had been clipped. It seemed to be a good idea to slide the heat shrink tubing onto the wire before baring the end of the wire to do the tinning and soldering. I used folded masking tape, sticky side out, to hold the battery boxes in place in the gondola. Once everything was hooked up, four Soshine IFR batteries were inserted in the battery boxes and LocoFi™ was turned on and tried. Everything worked as expected. The Conrail had never been Configured for use with the LocoFi™ App using 4 IFR batteries. It was configured on the demo layout's 16' 3" main loop using 7 steps and four fully charged Soshine Lithium Iron Phosphate (IFR) batteries. During the Configuration, the Connectors didn't appear to cause a great increase of resistance. Step 7 indicated a scale speed of 74 mph. The top speed was set to 65 mph, as that is the top speed of the full scale EMD GP15-1. After a bit of "running the train", the locomotive was returned to the bench. The connectors were disconnected and the leads from the locomotive were pulled out of the gondola. Next, the CSX with the Soo boxcar battery car had its connectors added. The battery boxes were removed from the boxcar frame. They had already been set up to use four IFR batteries, so there was no need to change for a new battery box. The two locomotives were set next to each other and the "hard wiring" of the CSX leads from the locomotive were clipped apart to be the same length of the leads from the Conrail locomotive. The connectors were added with the polarity the same as the Conrail. The battery boxes were taped back onto the boxcar frame. The unit was tested, and appeared to be working fine. The boxcar battery car was hooked up to the Conrail for the first time and CSX to the gondola. Everything was checked and all was working well. The CSX, using the gondola as the battery car for the first time was tested on the demo layout. It did not need to be reconfigured, as it had already been running using the four IFR batteries. A complete "train" that consisted of the CSX loco, gondola battery car with 4 IFR batteries, the Soo boxcar with 3 Efest batteries to keep the car near the NMRA recommended weight, the brown Conrail boxcar and a caboose was run very successfully. 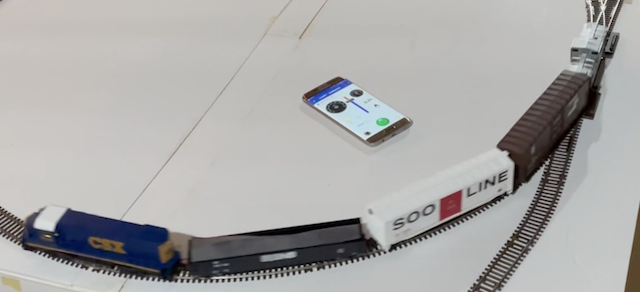
Success!!! I now have the ability to use either the gondola or Soo boxcar as the battery car for either locomotive or add either the gondola or Soo boxcar to a consist when using either one of the locomotives. This information, along with two videos, is also covered in the YouTube video titled, "Making and Using a Portable Dead Rail Demonstration HO Layout - Part 9". After doing this review, I was told about an alternative to the MicroMark connectors. I have lots of the MicroMark connectors still to use, but the Chanzon Round Pin Header Strip for Arduino look like they should work as well and be considerably less expensive than the MicroMark connectors. Can be purchased through Amazon. |