The Walthers Trainline Flyer Express Fast Freight Ready to Run Starter Set came well package in a sturdy cardboard box from Walthers through the purchase at Amazon.
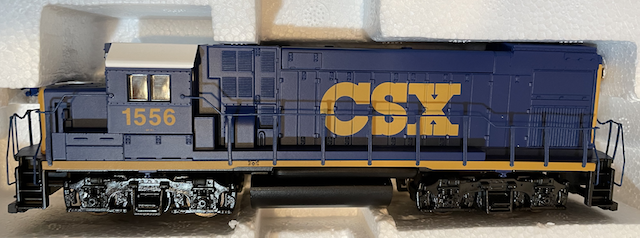
Locomotive in the train set packaging the day it arrived The manufacturer's box, with the train set in it, was carefully opened. I could see that the horn was not on the locomotive, but the horn was found to be packed separately. There was no note, in the very brief instructions, to indicate to the user, that the horn had to be attached. There was no glue supplied to attach the horn.
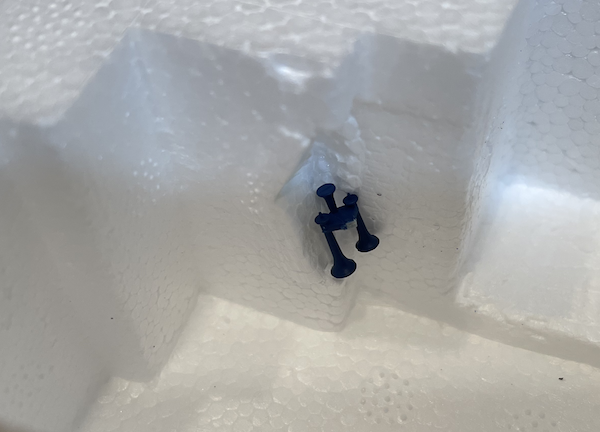
Position of horns in the train set packaging The locomotive, two freight cars and the wide-vision caboose were visually inspected. One of the two interior weights, and possibly something else, was moving around inside the boxcar when it was picked up. The train was weighed.
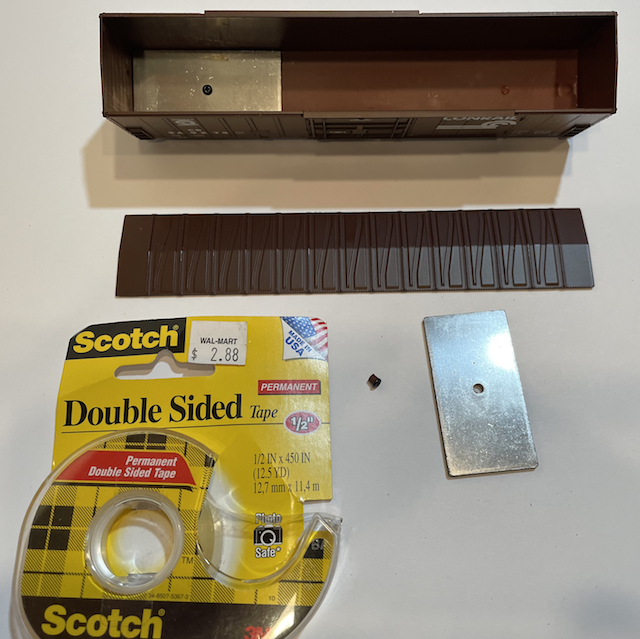
The Boxcar Supplied Weight Problem Double Sided tape was used to try and fix the boxcar weight problem. The top of the boxcar was carefully removed. The "bit" rolling around, along with the weight, was the "nub" with a screw in it that originally held the weight in place. The weight was double-sided taped in place and the roof reinstalled. When the whole train was put together for a test run the following day, the weight was loose again. Aleene's Original Tacky Glue was used to secure it. In the train set, Walthers provides what they call "Power-Loc Track". Assembly of the track is extremely difficult. I found that by watching the short disassembly video of this track, it gave me a hint as to how it goes together. To assist the tracks "clicking together" I curved/bent a craft stick to the radius of the inside roadbed. I put the bent craft stick, held by my fingers on both hands, on the inside of the track roadbed and used both thumbs on the other side to press the track sections together. It took a very l-o-o-o-n-g time to put together the track oval. Once the oval of track was assembled, the complete track oval unit was easily moved around and even carried about as a whole unit without coming apart. YouTube user, Train Tsar Fun, shared his opinion of Power-Loc track in this YouTube video, which is dated Sep 10, 2021. After carefully checking all of the track joints and positioning the track oval on the cement basement floor, as the loco couldn't fall far from there, it was time to set up the throttle and power pack and run the locomotive on DC track power. The extremely stiff, approximately 25" long wire, that is connected between the controller and the track, was unwound. Following the directions, it was connected to the track and controller. The controller has two 16V DC outputs. One is for a fixed 16V output and the other is used to control the speed of the locomotive. The 16V DC power supply has a 79.5" cord and that was plugged into the controller. The spade lugs, on the connection wire to the track rerailer section, were extremely difficult to slide onto the fittings attached to the track power section. None of the provided information noted whether the lights were LEDs or grain of wheat. After running the locomotive and watching carefully, they appeared to be LEDs and were later confirmed to be LEDs. The locomotive ran very, very smoothly, even at very slow speed. To read the track voltage and amp draw of the motor, two multi-meters were used. One meter was set to read the DC track voltage. One of the leads from the controller to the track was clipped and the clipped ends bared to attach the clips on the other multi-meter, which was set to read the amp draw between the controller and the track, which was providing power to the locomotive. Only the locomotive was run at about 12V, as measured on the track. The other multi-meter showed an amp draw of 0.15A or 150mA. The three cars, that came in the set, were added to form a train. With the track voltage at about 12V, the amp draw varied between 0.15A and 0.16A. Unfortunately, that information was not as useful as I'd hoped it would be for predicting battery run time. I later calculated an average amp draw, using a 3S Lithium-based LiPo battery, of almost double that amp draw. :-( That later also proved to be the case when using 3 IMR 350mAh cylindrical batteries or 4 LiFePO4 280mAh cylindrical batteries. |